Welcome to our Creative Ideas Blog – quick simple low-budget art ideas for teaching art to kids.
RAW art is a team of art specialists who run art incursions in schools and kindys throughout SEQ and Sydney/ Newcastle. We also have a fabulous range of DIY art kits which we send to schools and kids throughout Australia.
Creative Costumes – lets go BLING!
Throughout September and October I am focusing on some manageable and thrifty costume ideas which could be made for Halloween, or perhaps they will be useful for your next Bookweek dress-up?
Home-made costumes are great, as long as the labour doesn’t all fall on the parent’s shoulders! So get the kids involved, they can definitely construct this wearable art with just a bit of help.
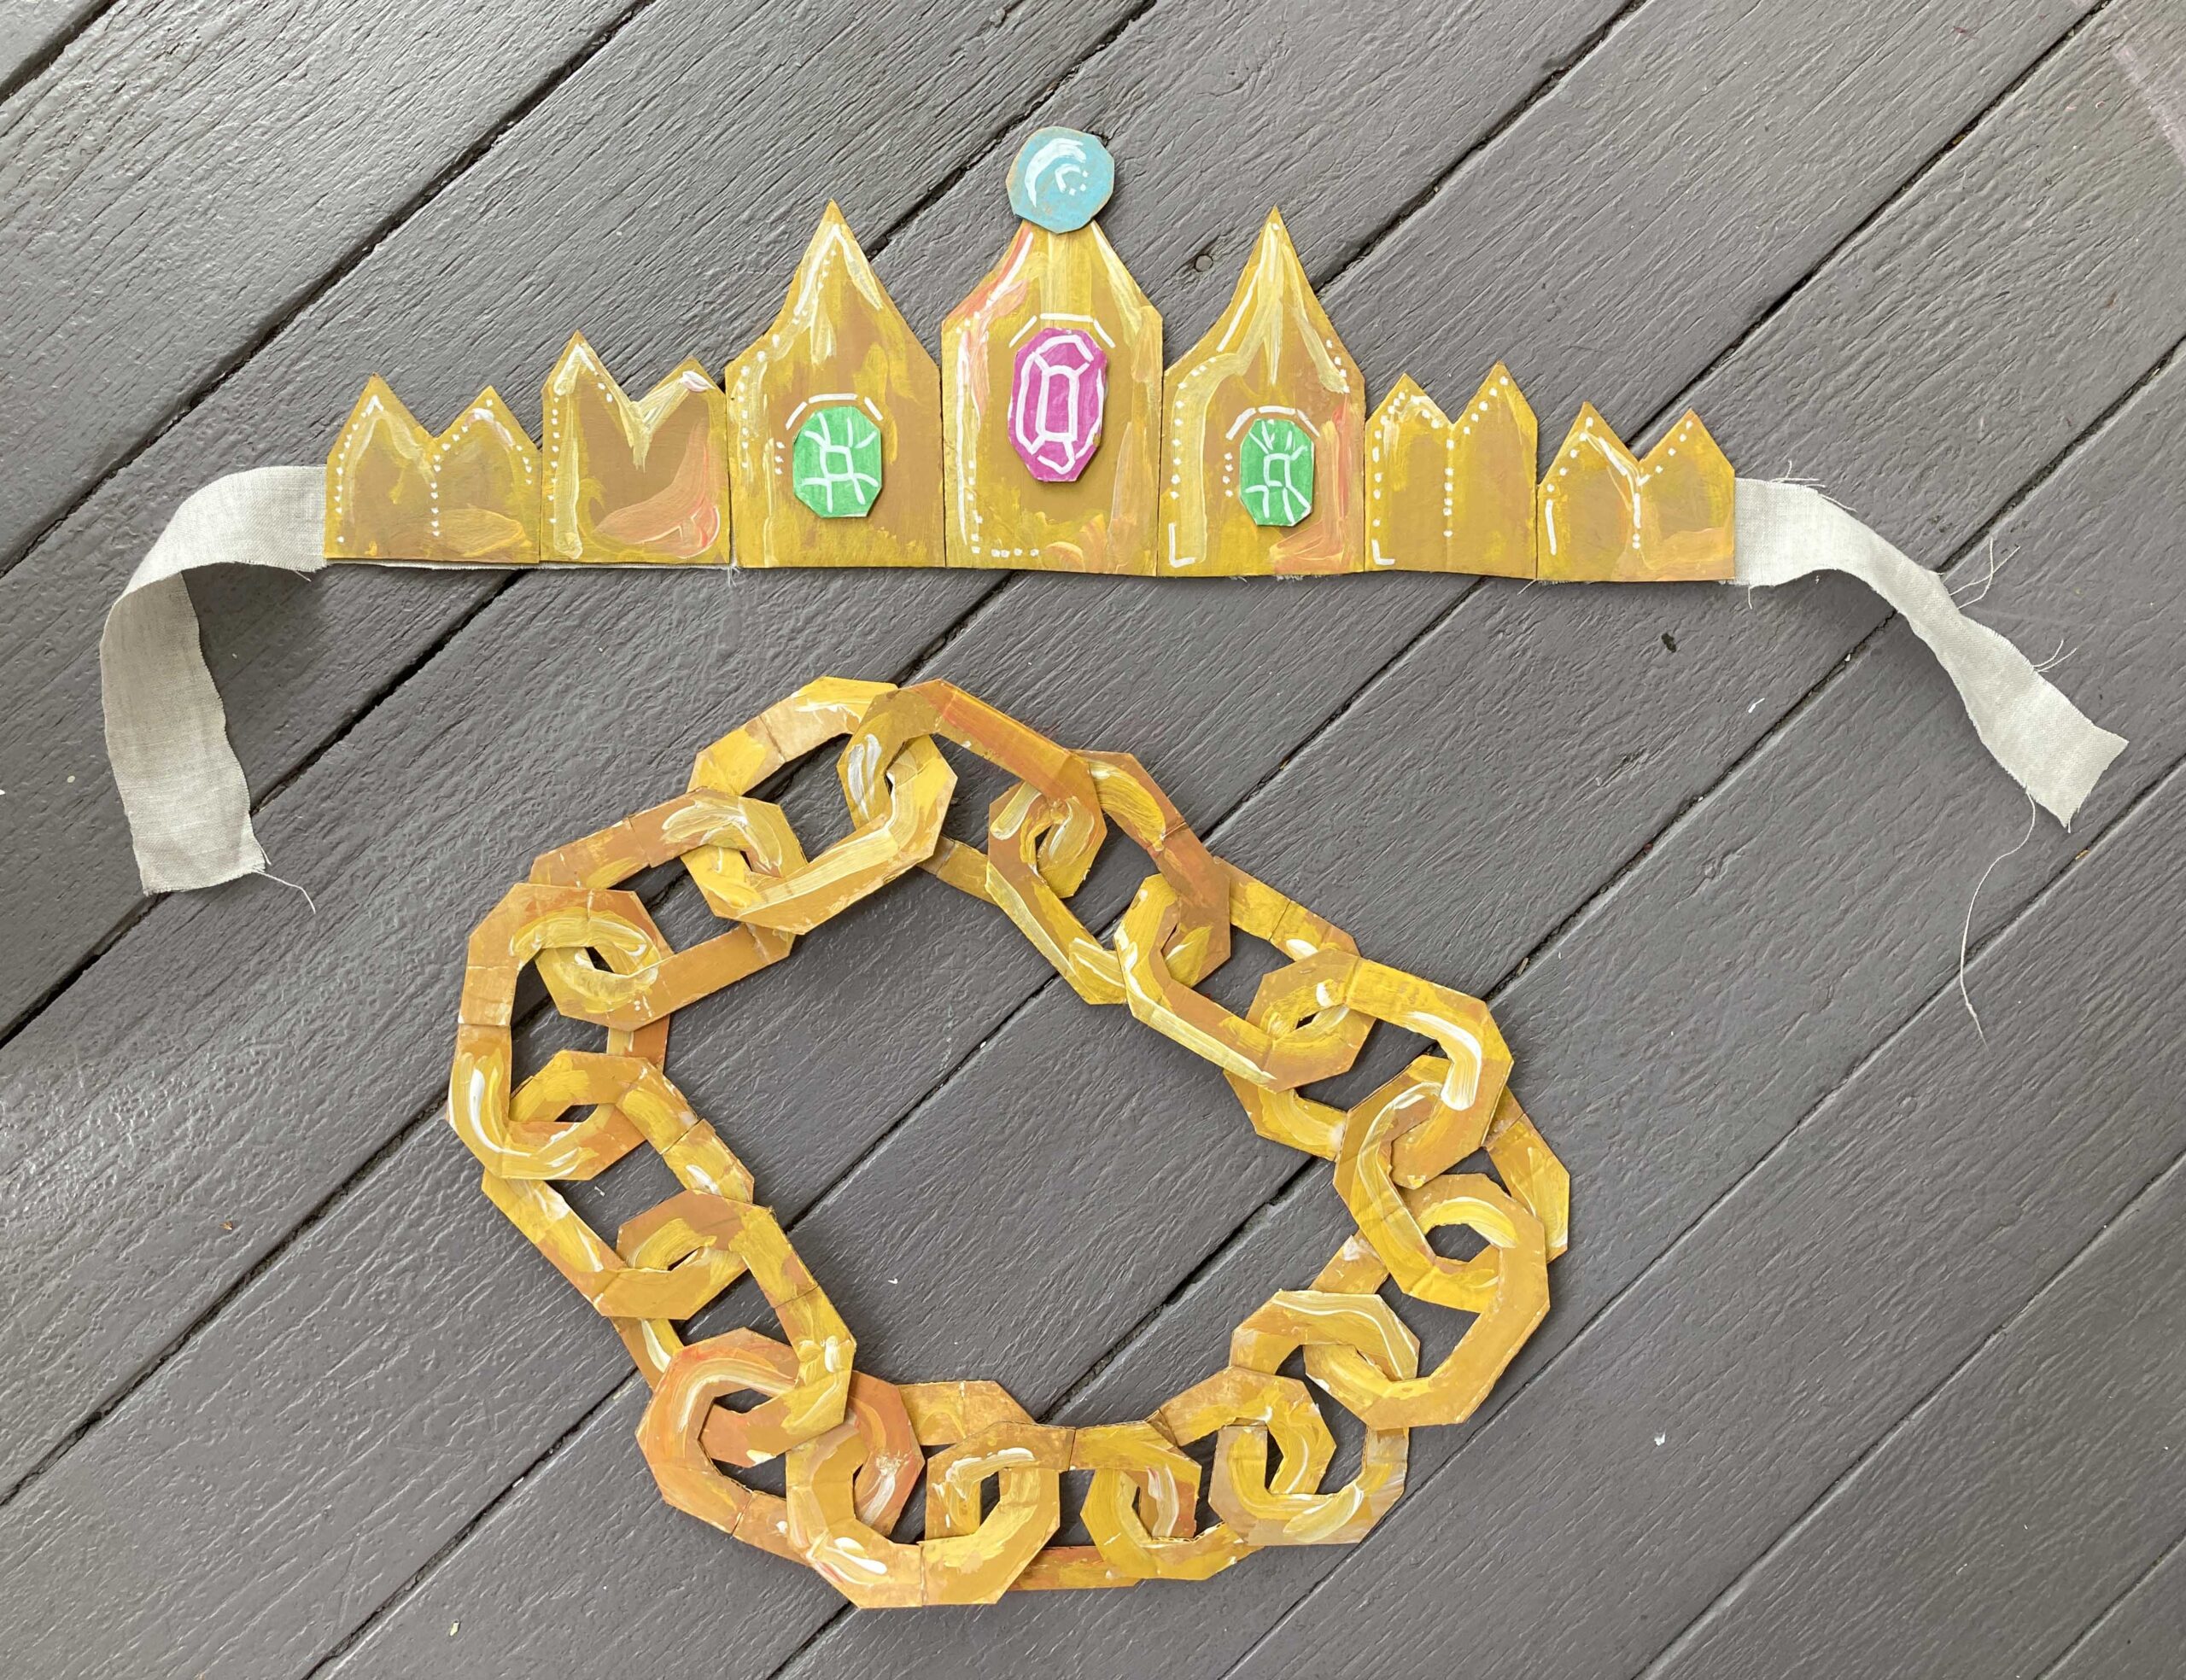
This week I am creating some bling, a gold chain necklace and a crown. These accessories are durable, and can be embellished in any way you like to suit your dress-up theme.
I have tried to use whatever materials I had lying around the house, some cardboard from the recycling bin, scissors, some fabric scraps, PVA, a paintbrush and some paints.

Gold necklace:
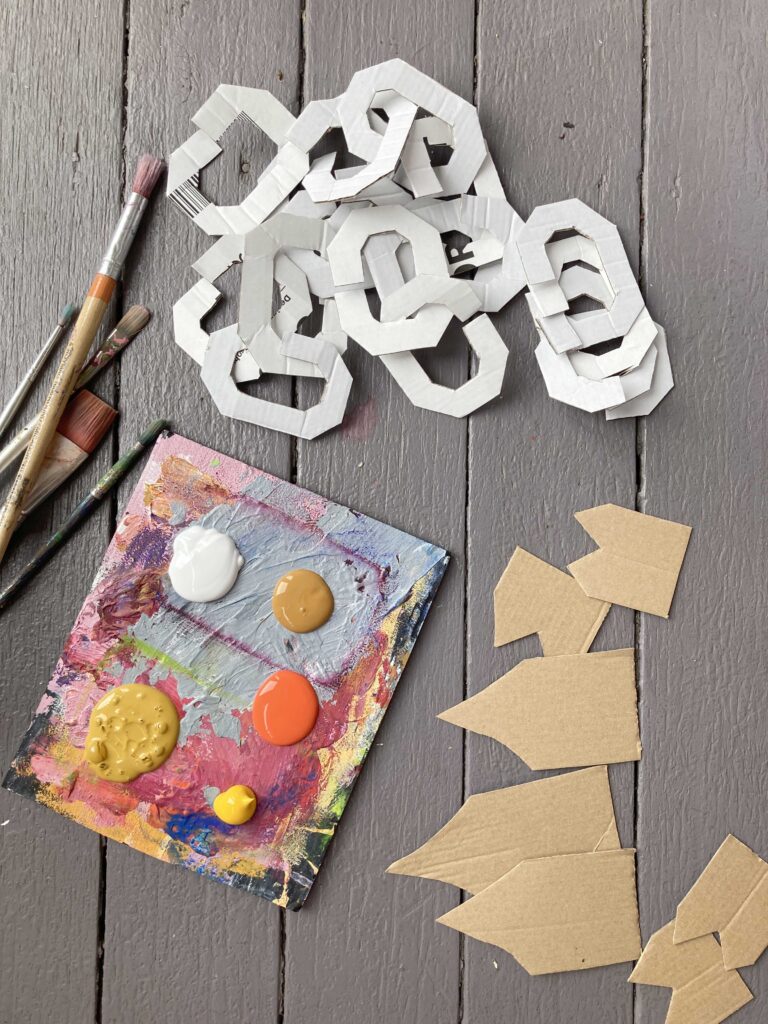
You will need about 3 A4 sized pieces of card, not too thick, or too thin, I used an IKEA wine box which is sturdy but light. Cut out around 16 pieces rectangular pieces of card, about the size of my palm. Then cut the corners off each, and then cut out some ovals from the centre to get that chain link shape. I cut straight through the edges to get to the middle which means the links open up, this is important so they can be threaded together later.
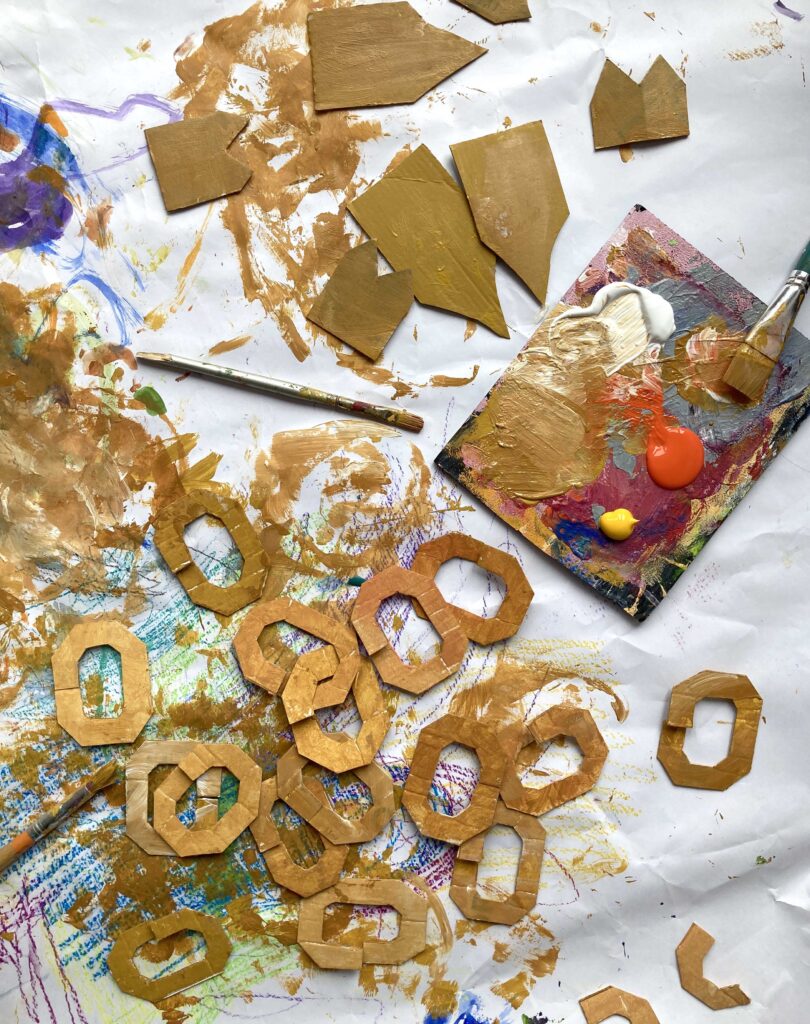
Get out a range of paint colours, browns, yellows, oranges, reds, and whites work well. Gold is an interesting texture to achieve, start by laying down your browns and oranges, this is an easy task for kids, colouring in the shapes on both sides. Then once those layers are dry, add some yellow and white highlights in the edges and corners. Try not to get too caught up on the details, sometimes messy is best for shadows/highlights.
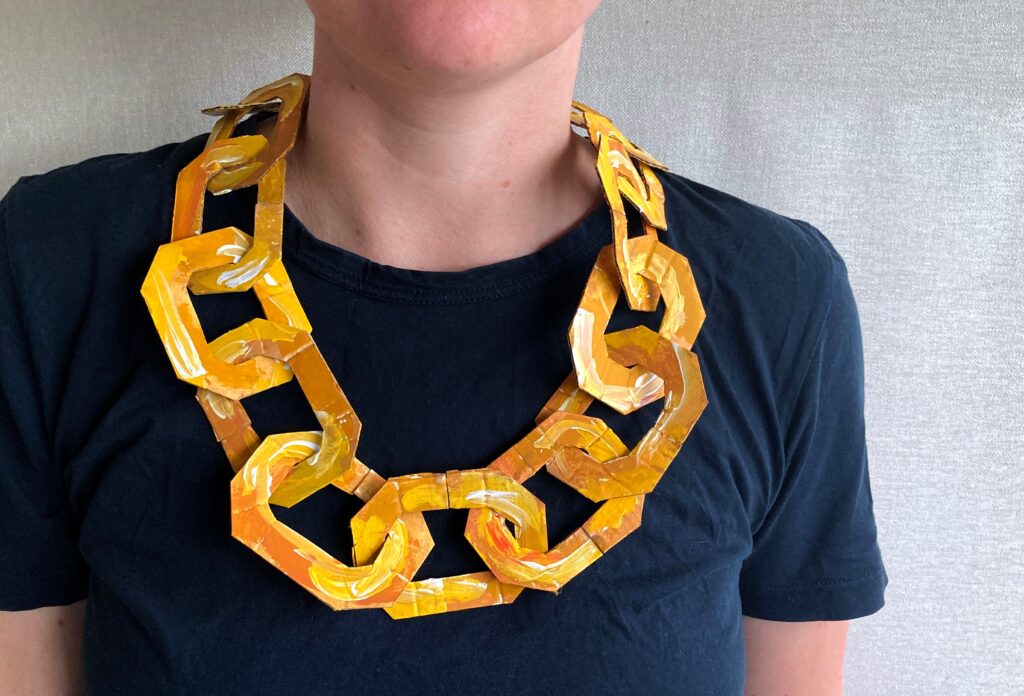
Once the paint on the links are dry connect them into one long chain. Now line up the cuts/breaks in the chain links and dab a little PVA onto each one. Leave for an hour or so for that glue to dry before wearing.
Crown:

Design your crown out of pieces of card about 5cm wide. It is important that this crown design is made in segments to allow it to wrap around the head. Shapes that are pointy on top look good. And while you are in the cutting mood, cut a few gems or crystals for embellishment later.
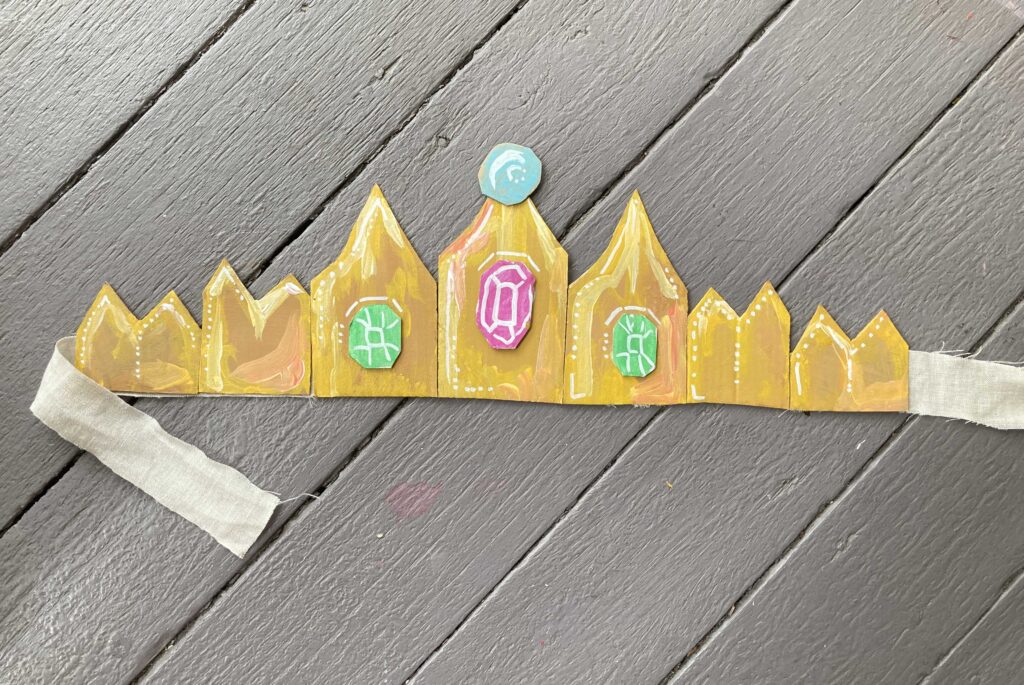
Now paint your crown gold, same technique as above, get out a range of paint colours, browns, yellows, oranges, reds, and whites work well. Start by laying down your browns and oranges, this is an easy task for kids, colouring in the shapes on both sides. Then once those layers are dry, add some yellow and white highlights in the edges and corners. Try not to get too caught up on the details, sometimes messy is best for shadows/highlights.
Your gems can be painted with paint or felt tip pens, but I used coloured paint markers.
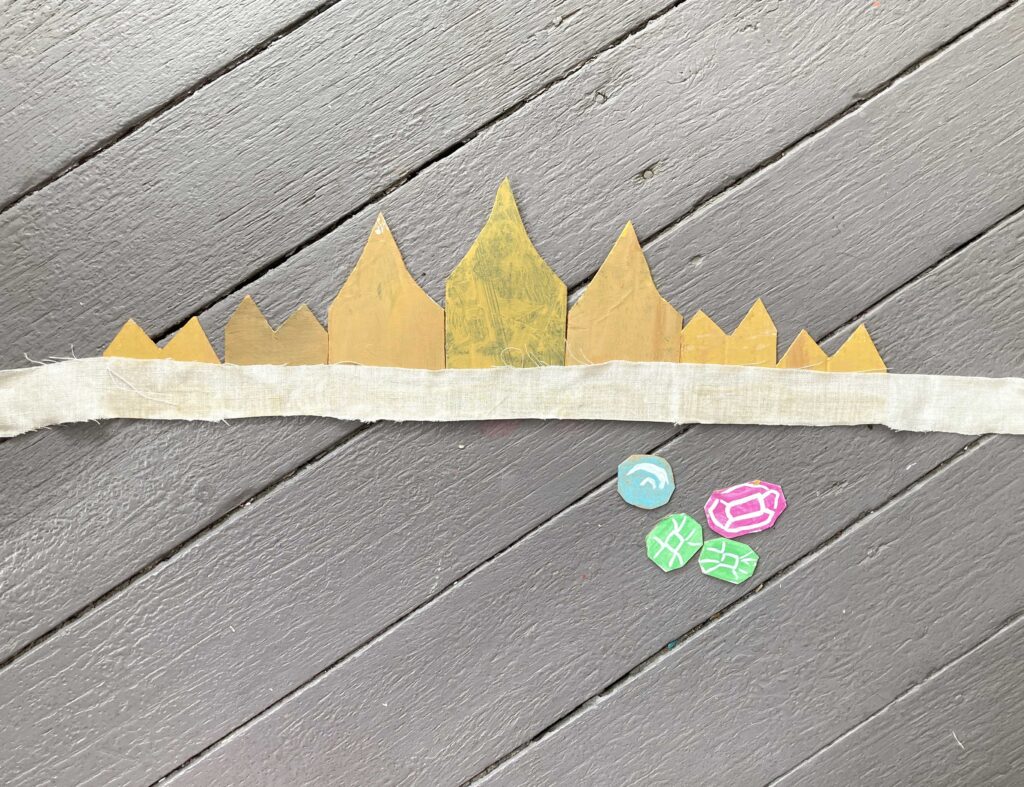
While your card segments dry, find a strip of scrap fabric (not too stretchy or thick and heavy, I used some linen). The fabric strip needs to be long enough to wrap around your child’s head and tie in a knot, and about 2cm wide.
Line up your crown pieces in a line side-by-side, and paint PVA glue along the bottom edges. Lay the fabric strip onto the PVA dry and pat down, let dry for a few hours.
Flip over your crown and work on your details and embellishments. Glue on your gems, and add some sparkle. Glitter is always fun in small sections.
This project is getting me super excited for Halloween – we can all bling up those drab old princess costumes big time. No excuses! Grab a box, and get cutting!
Looking forward to sharing our next costume idea with you soon!
Do you have any kids costume making tips?? Share in the comments below……..
Until next time.
Tracy X
. . . . . . . . . . . . . . . . . . . . . . .