
Upcycle Costumes
Throughout September and October I am focusing on some manageable and thrifty costume ideas which could be made for Halloween, or perhaps they will be useful for your next Bookweek dress-up?
Home-made costumes are great, as long as the labour doesn’t all fall on the parent’s shoulders! So get the kids involved, they can definitely construct this wearable art with just a bit of help.
This week I am creating a sword and a wand. These accessories are durable, and can be embellished in any way you like to suit your dress-up theme.
I have tried to use whatever materials I had lying around the house, some cardboard from the recycling bin, scissors, some fabric scraps, PVA, a paintbrush and some paints.
Wand:
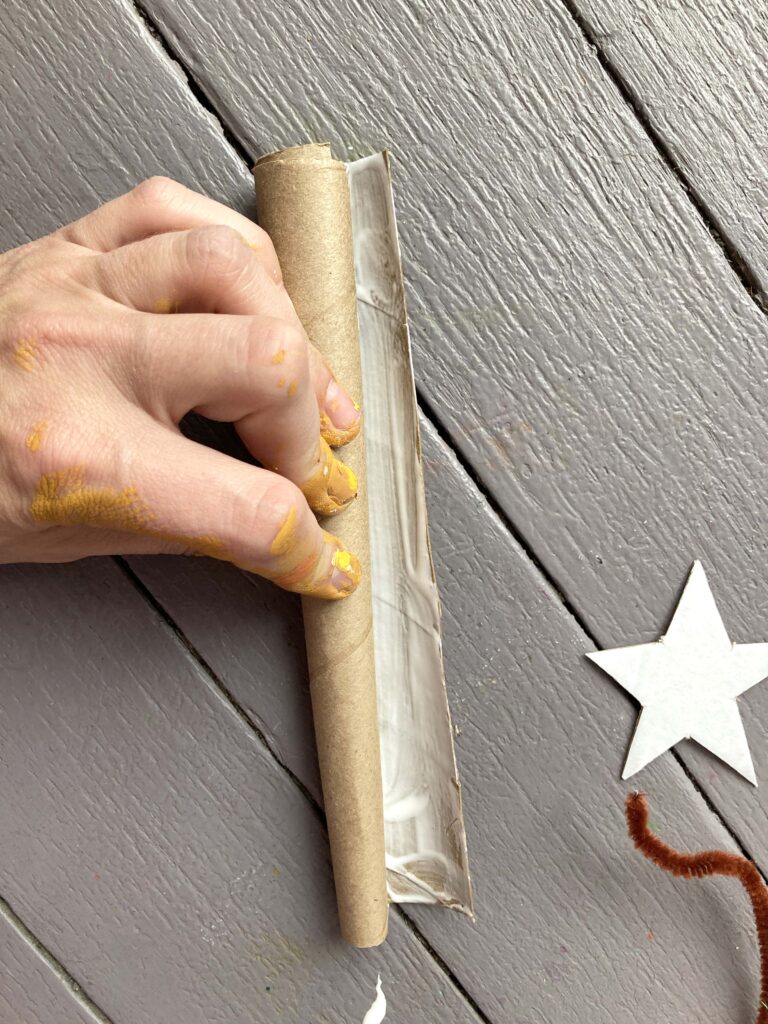
Get a cardboard tube that is thin enough to cut, a paper towel tube worked well for me. Cut this straight down the side, and roll it tightly a few times, this can be tricky. Once you have practiced that a few times, get some PVA ready on a brush and about 3 pipecleaners or some wire ready. Roll the tube again, I like to have it a bit conical, paint the PVA along the edge, and then wind the pipecleaners around to hold it together for an hour or so while the glue dries.

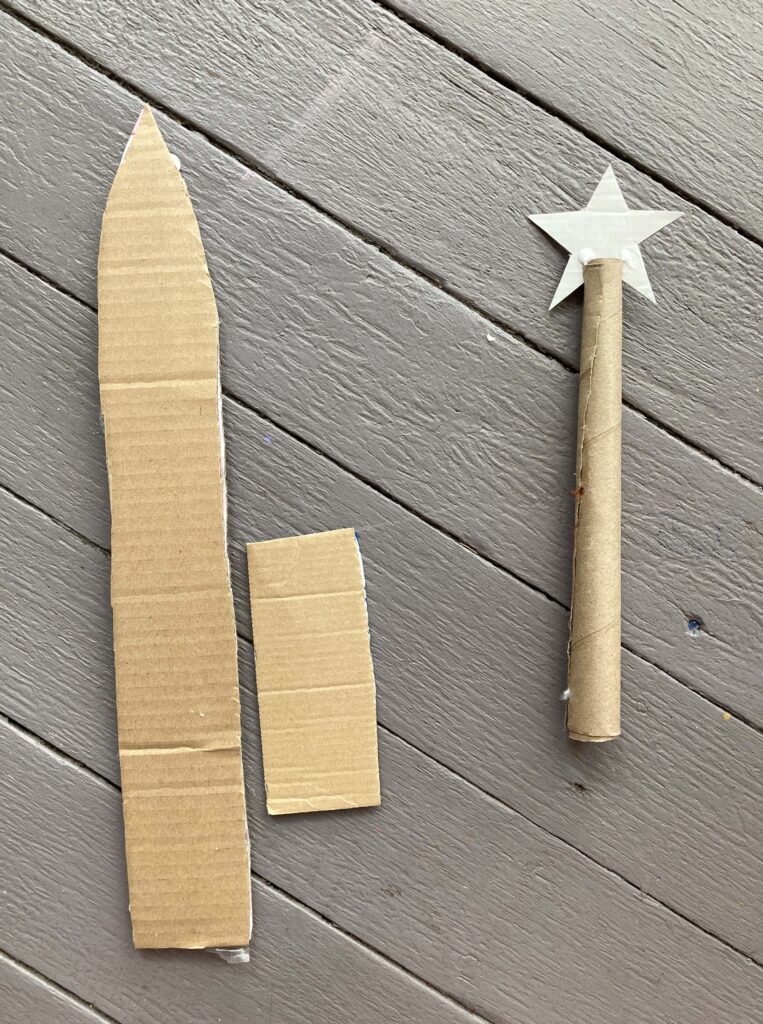
Meanwhile cut a cardboard star or other preferred shape out, this will get slotted onto the pointy end of your wand and PVA glued in place.
Once all this is dry remove your holding pipecleaners. Now paint your wand whatever colour you like, and of course if you have glitter around then go to town with that too. Or maybe tie some ribbons from the bottom to make it even more magical.
Sword:
You will need two identical solid bits of cardboard cut into long strips with a pointy sword-shaped end. You will also need two short rectangles to make the cross section of the handle. Glue the matching pieces back to back to make your sword sturdy.

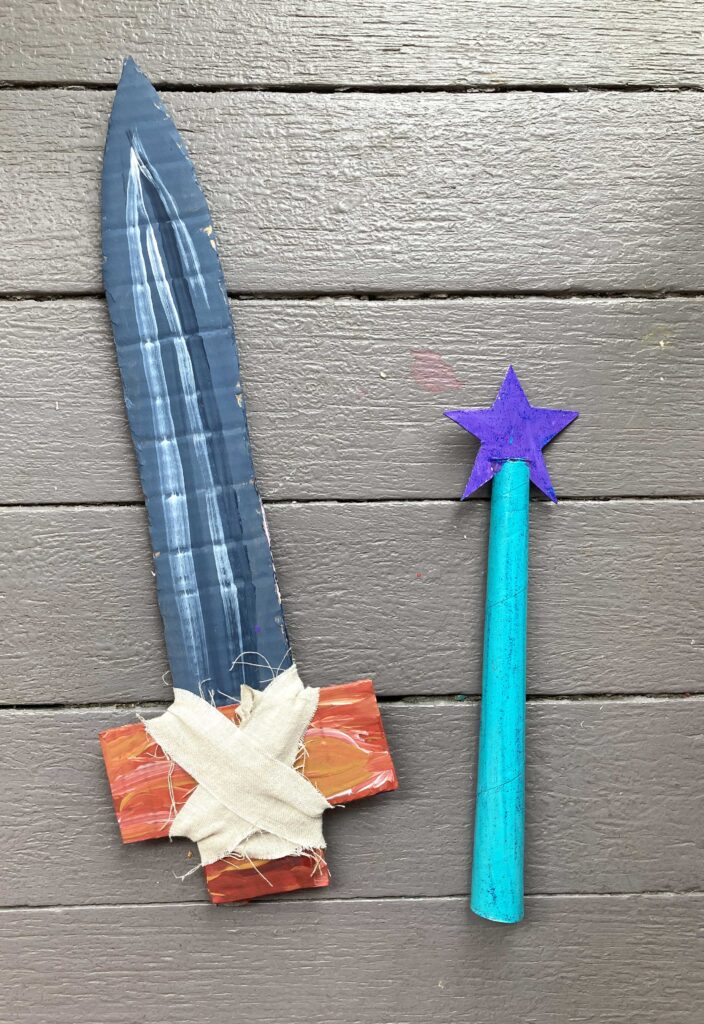
Dry for an hour or so, and then paint your sword. I used a mixture of black, grey, and white highlights on the metal part of the sword, then swirly browns, reds and yellows on the wooden handle part.
Once the paint is dry, dab some PVA glue down to secure the handle cross-section, and then wrap around the handle some crap fabric strips. A bit of PVA will hold that final bit of fabric down.

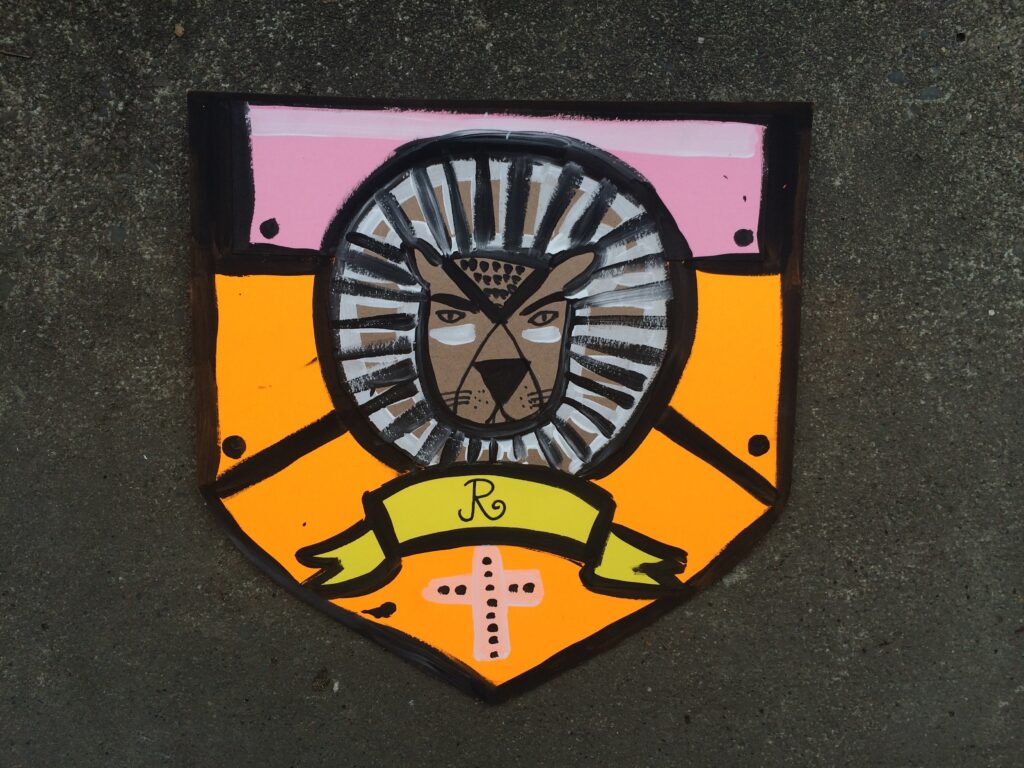
Maybe you could also make a shield – this example is just made from thick sturdy cardboard with an animal design cut from brown kraft paper. I just outlined in black paint to really make it bold. You can fashion a simple handle on the back with a strip of card and some strong tape, or glue.
Another few simple projects for you to add to your costume making possibilities.
We would love to see your finished wands and swords – be sure to share with us. Or maybe you have a simple idea you would like to share with us………..let us know in the comments below!
Until next time.
Tracy x
. . . . . . . . . . . . . . . . . . . . . . .