30 years of inspiring kids
motivate, create, explore

Blog

Crafty Christmas Trees x 5 ways

We have officially hit the home stretch of 2020. Are you looking for a good old fashioned ‘Chrissie Craft’ idea to keep those cherubs happy??

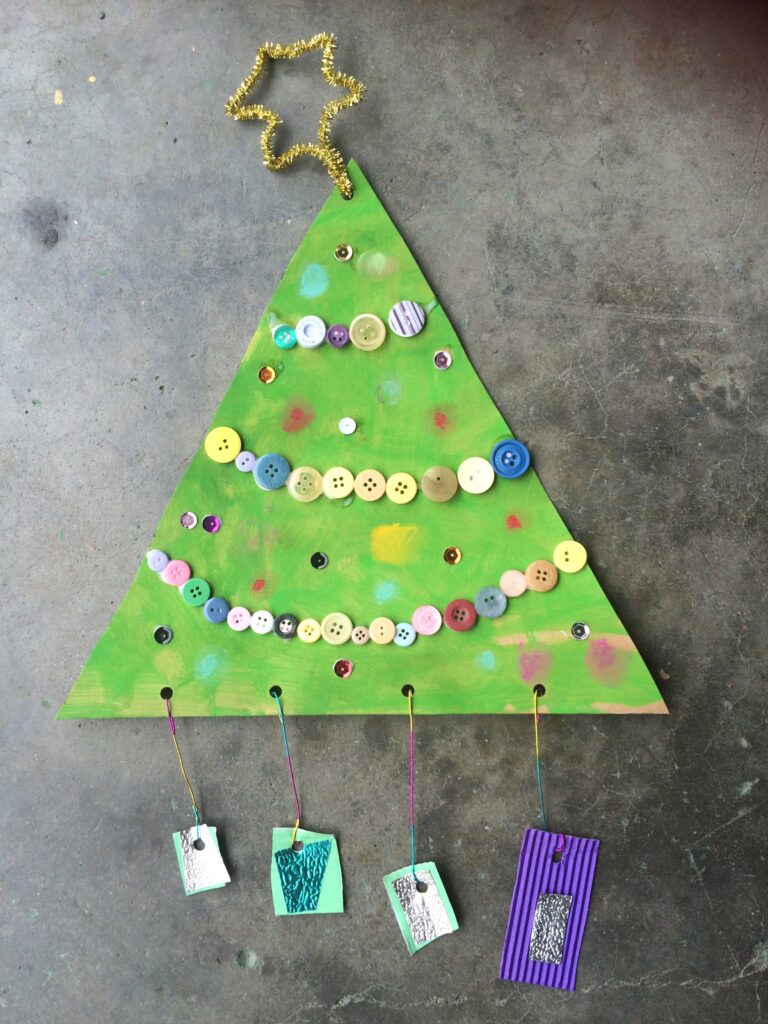
We have 5 x budget friendly/ easy / fun ideas for you – all based around one of our favourite Christmas symbols – the Christmas tree. These ideas don’t require a lot of resources – mainly cardboard, paper and paints (perhaps a few added trimmings like pipe cleaners/ buttons/sequins – but these can be replaced with string and other bits of collage you have left in your cupboard).

 It’s beginning to look a lot like Christmas – lah lah lah……

Christmas tree 5 ways!

  1. Box Card Tree – this is a great way to use up any thick card you have filling up your storage room. Do these individually – or as one large classroom project. Cut 3 x triangles of different sizes ( large/ medium/ small). Paint each triangle green, or you could do one green, one red, one white. Allow to dry, and then PVA glue together to form your tree. Now decorate!! Collage with shapes/ metallic paper/ sequins/ beads/buttons. Just try to stick to those lovely festive colours. And – don’t forget the star on top!
  1. Clay sculpture trees – working with clay form a cone shape – start with a ball, then roll into a cylinder shape, then roll one end of the cylinder to form a cone. Tap the base so it stands up like a tree. Paint green ( or silver/ or white/ or gold) neatly all over – press small beads and buttons in to decorate, or use a cotton tip to dip into paint and print baubles all over. Create small texture marks with a toothpick. Make a few trees of different sizes and colours to cluster together – these will look great in small groupings.
  2. Fringe Tree – perfect way to use up any last remaining collage media you have in your art supplies – just try to stick only to your Christmas colours ( red/ green/ black/ white/ silver/ gold/ yellow). Perhaps you could work at making some painted paper/ splatter with paints/ inks, to be used in this project. Start with an A4 base card – cut into a simple tree shape. Now cut your scraps into a series of assorted strips. About 5 cm wide. You will need about 10 strips for a tree. Cut a series of fringe cuts along one edge of each strip. Now glue in rows on tree – starting from the bottom working up to top – be sure to over hang each layer slightly. Flip tree over, and trim off all over hanging pieces. Make a star to put on the top of your tree.
  3. Printed Banners – this idea is simple and fun. You will need to create a few tree stencils by cutting out some tree shapes (the positive shape) from some A4 card. Have kids stencil these by sponging paint carefully over the stencils onto a piece of coloured card, or brown kraft card. Then decorate with collage – collage outside the tree with some strips of paper, and inside the tree with some buttons or sequins. Hole punch the tops so you can thread though with a stick, or just use pipe cleaners/string to attach on for hanging, and fringe the bottom with your scissors to really finish it off nicely. A gorgeous festive banner! Stencilling is really fun – try stencilling a large piece of card to create a table cloth, or a back drop.
  1. Layered Trees – this project involves a range of card and paper of different sizes and colours – the largest could be A4 size, down to the smallest which is about A7 size. Maybe work with about 5 layers. Children can cut one large tree from their A4 size (perhaps the simple triangle style of tree is best), and then repeat that shape across all their pieces of paper, going smaller each time (these could be just the triangle shape minus the tree trunk). Fold each shape in half down the centre of the tree, layer from biggest to smallest, and staple in middle. Decorate with pens creating lots of patterns on each layer. Create some little presents to hang from the base of the tree, and don’t forget a star!

And just one other cute little tree idea for you too! This one made by Sophia aged only 5 years old – on a box card base.

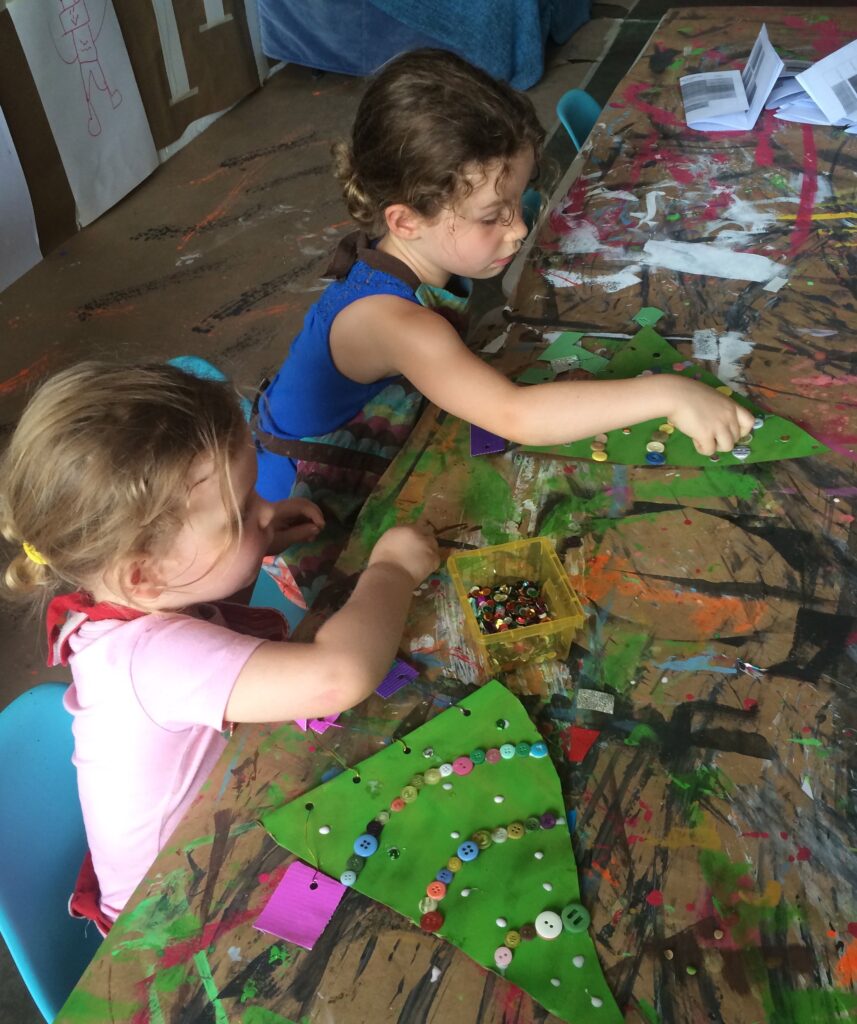
Go and see what you have left over in your supplies room, and get busy!! Turn on those Christmas carols, get the scissors and glue ready for one last thrashing, and get making! Ho ho ho!

Happy creating

Tracy x

Bring creativity into your classroom.

Inspire your students to think and learn in new and exciting ways. Book a RAW Art workshop for your class today.

We will be in touch within 48 hours.