
Welcome to our Creative Ideas Blog – quick simple low-budget art ideas for teaching art to kids.
RAW art is a team of art specialists who run art incursions in schools and kindys throughout SEQ and Sydney/ Newcastle. We also have a fabulous range of DIY art kits which we send to schools and kids throughout Australia.
Creative Costumes
For the next four weeks I am going to focus on some manageable and thrifty costume ideas which could be made for Halloween, or perhaps they will be useful for your next book week dress-up?
Home-made costumes are great, as long as the labour doesn’t all fall on the parent’s shoulders! So get the kids involved, they can definitely construct this wearable art with just a bit of help.
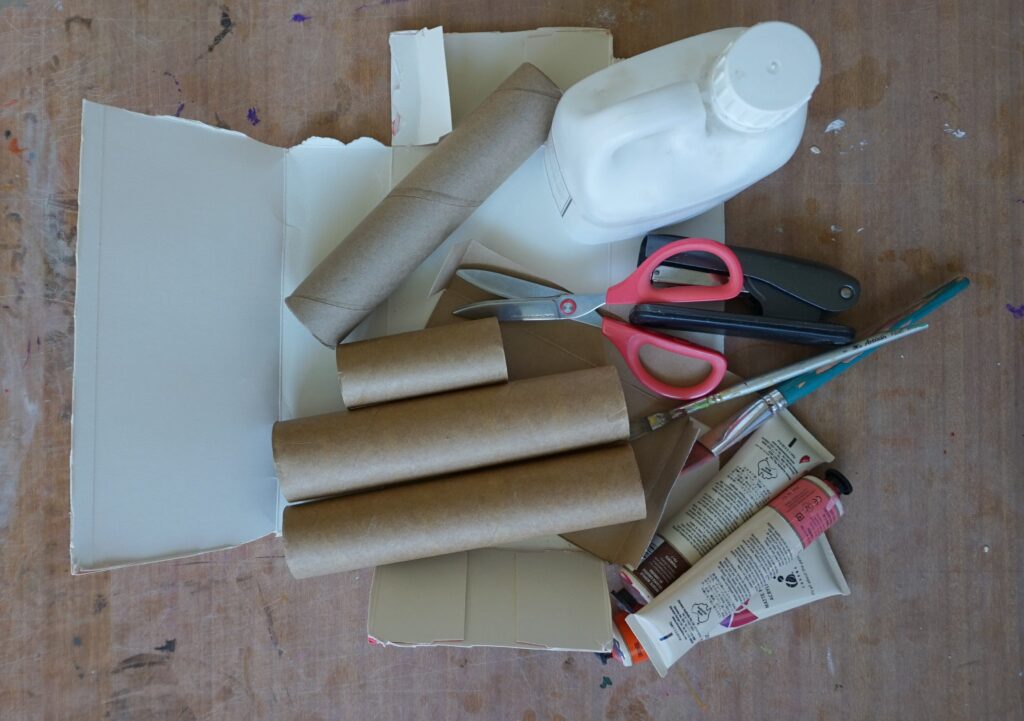
This week I am focusing on some animal accessories- ears and claws. This idea can be used for a range of animals, just tweak the shape and the colours you use. I have tried to use whatever materials I had lying around the house, some cardboard from the recycling bin, stapler, scissors, PVA, a paintbrush and some paints.
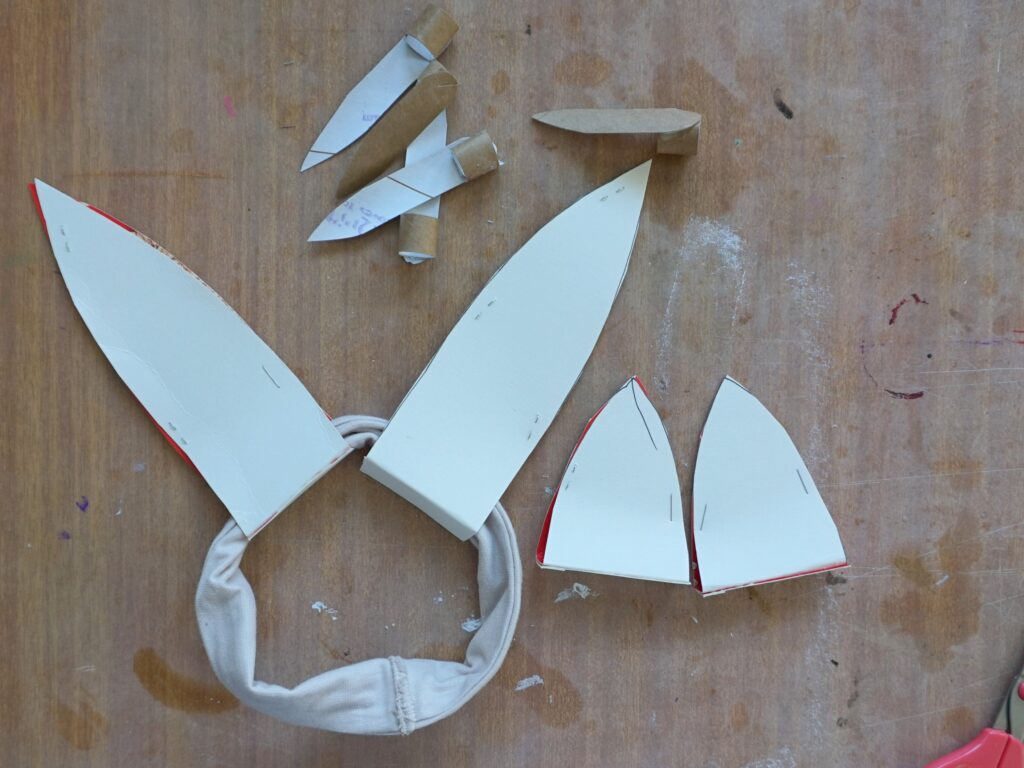
Claws:
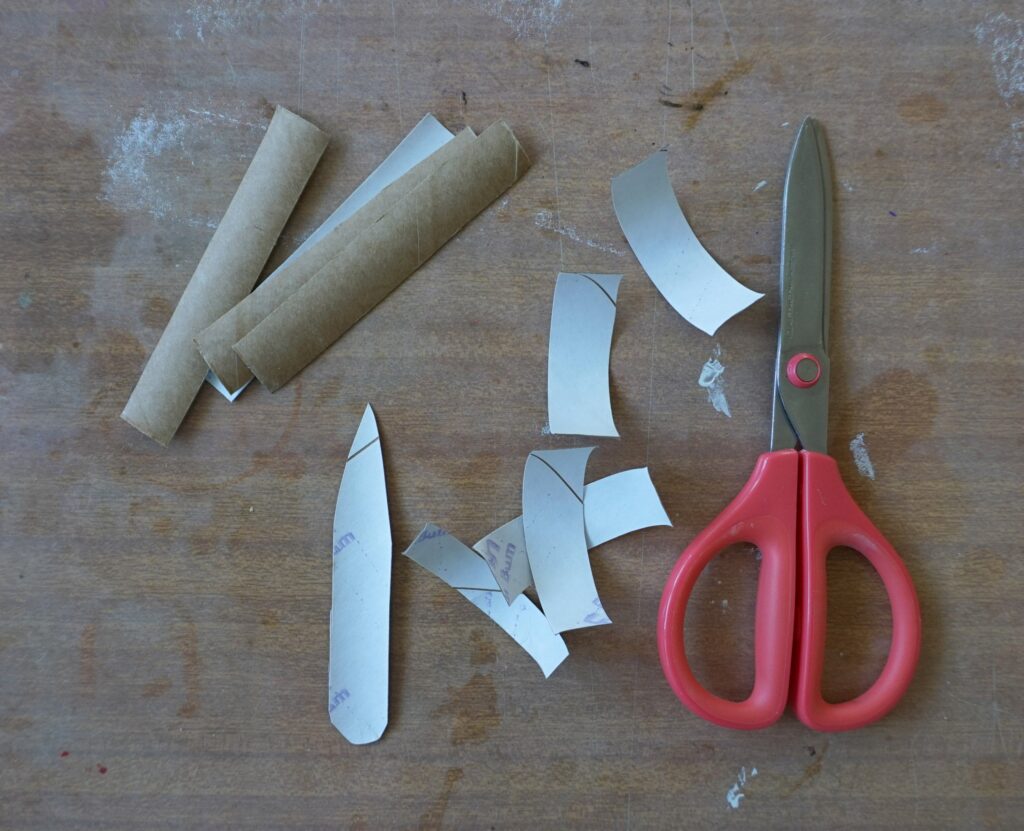
Using 2-3 toilet roll card tubes, cut the tube into chunky strips longways, try to get 10, one for each finger. Cut the rest of your tube sideways so the card strips curl, these ones will get measured roughly to fit around your finger, the straight ones get shapes with scissors to represent sharp claws!
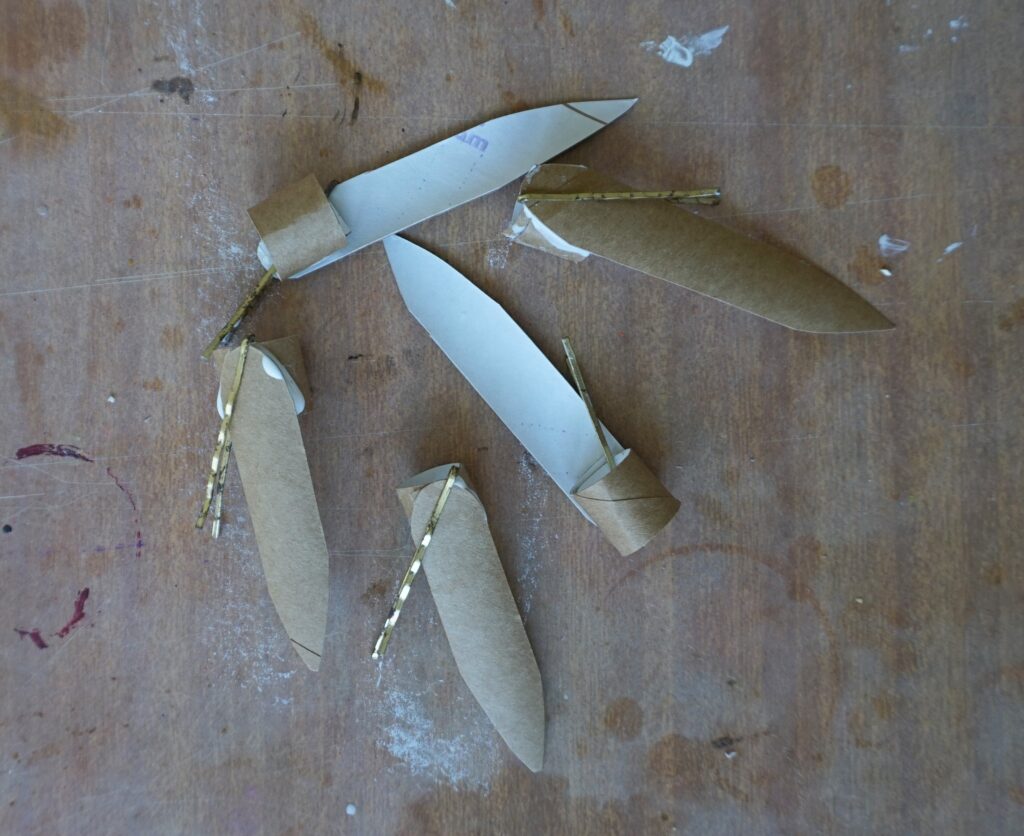
Now glue the card bits together, this can be tricky getting the card to stay in place while the PVA dries, but I found strong bobby pins worked really well at holding the pieces in place for an hour or so while they dried.
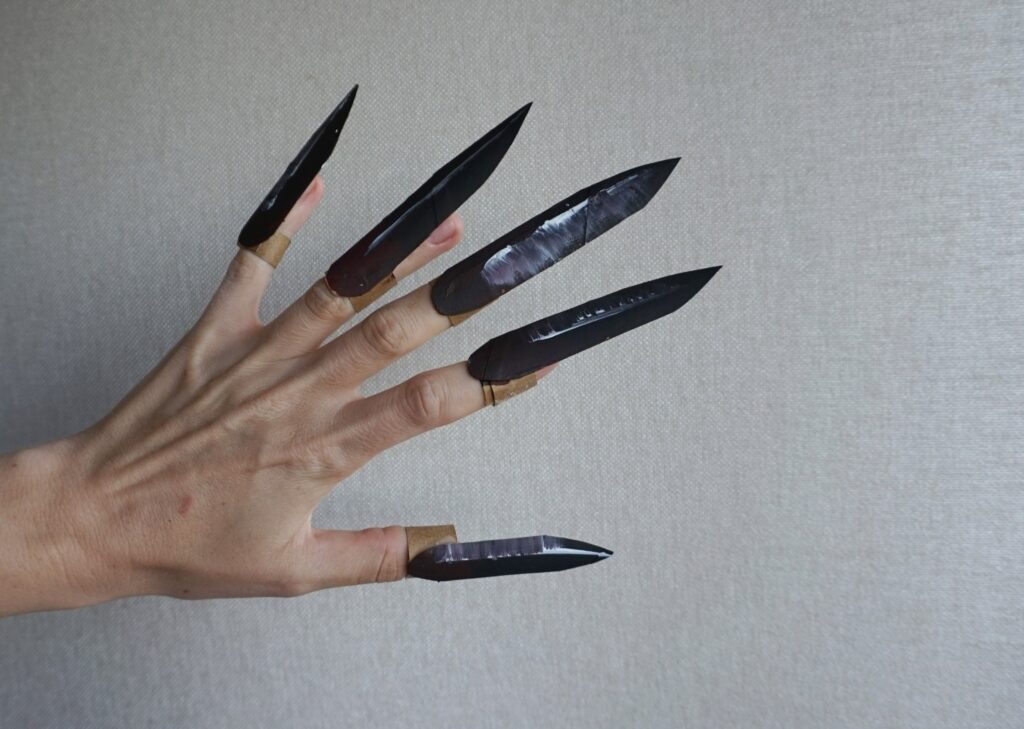
Now paint the claws, black is very dramatic! But try blend in some other colours such as green, or purple for effect, and some white to make them look sharp and shiny.
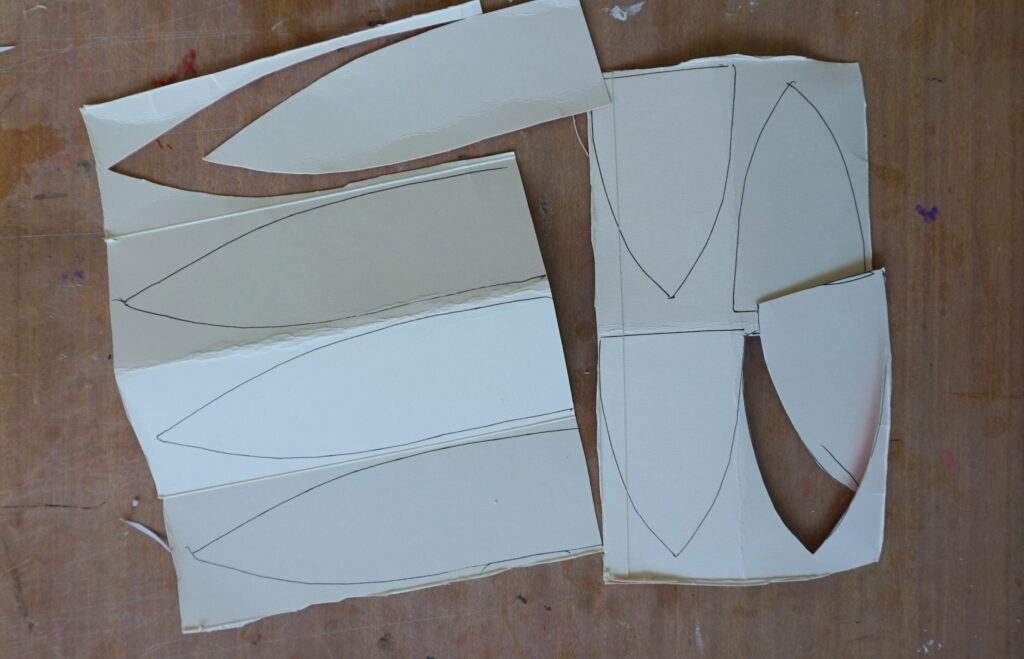
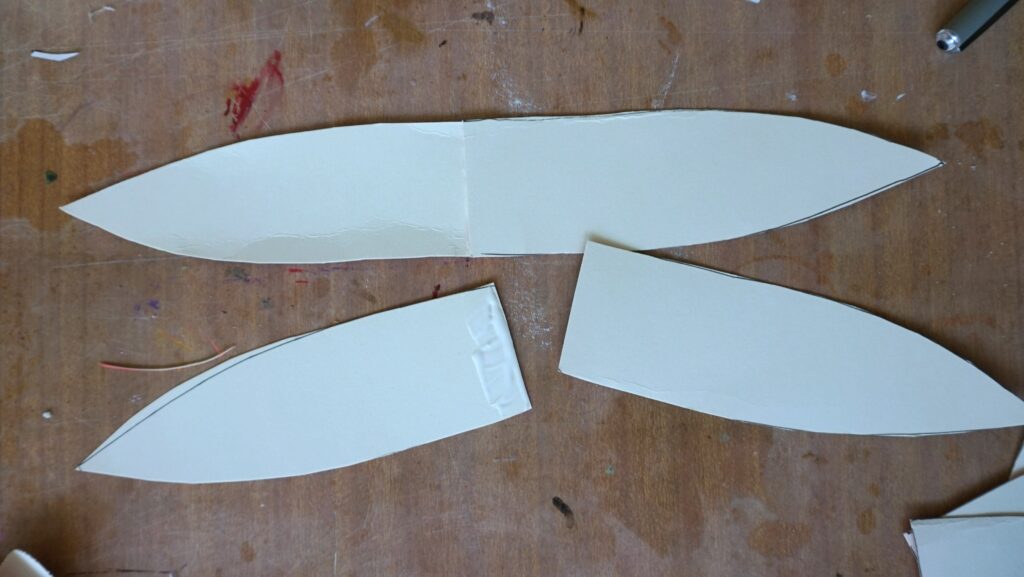
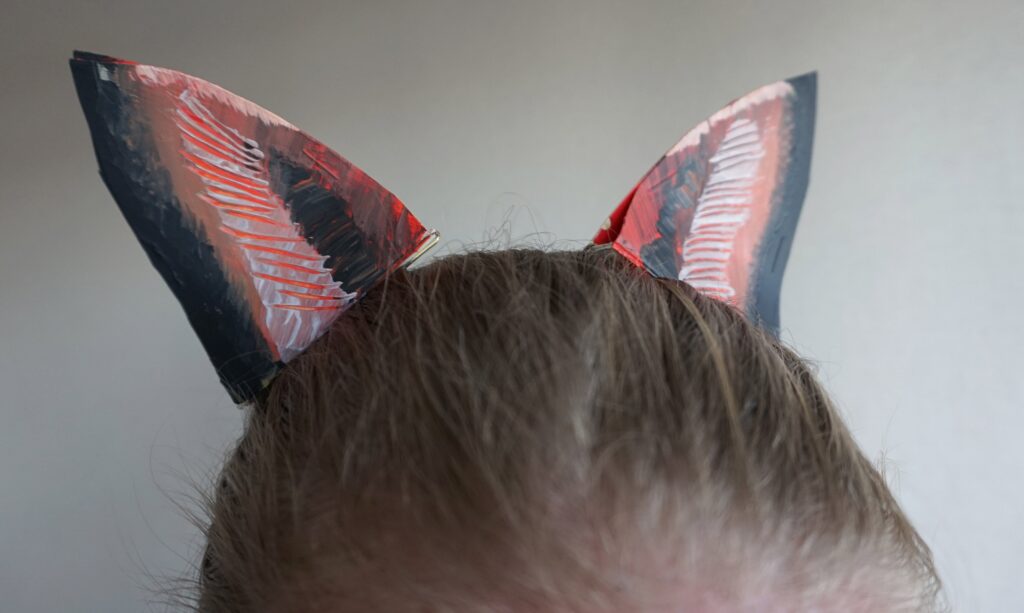
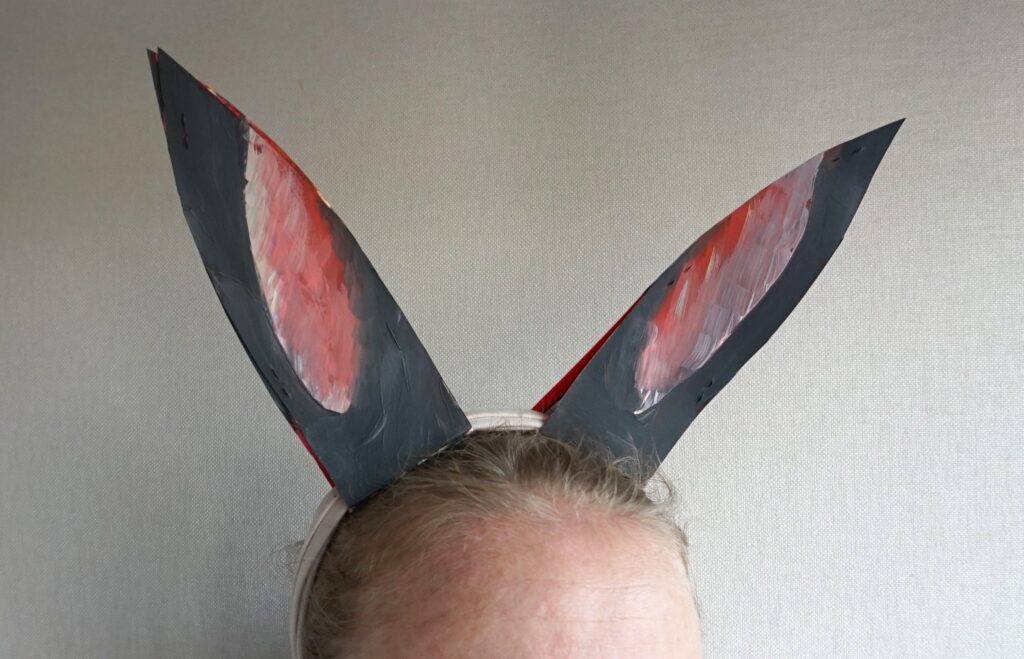
Ears:
Draw the ear shape of your animal on some cereal box card, cut it out and then trace 3 more. Cut each out so you have four. Glue with PVA the straight ends overlapping by about a centimetre. Leave to dry a few hours, then the cardboard ears fold up (fold is next to the overlapped section) and get stapled together. The overlapped section creates a strong flat area which will sit flat against the head and will allow for bobby pins or a headband to be threaded through.
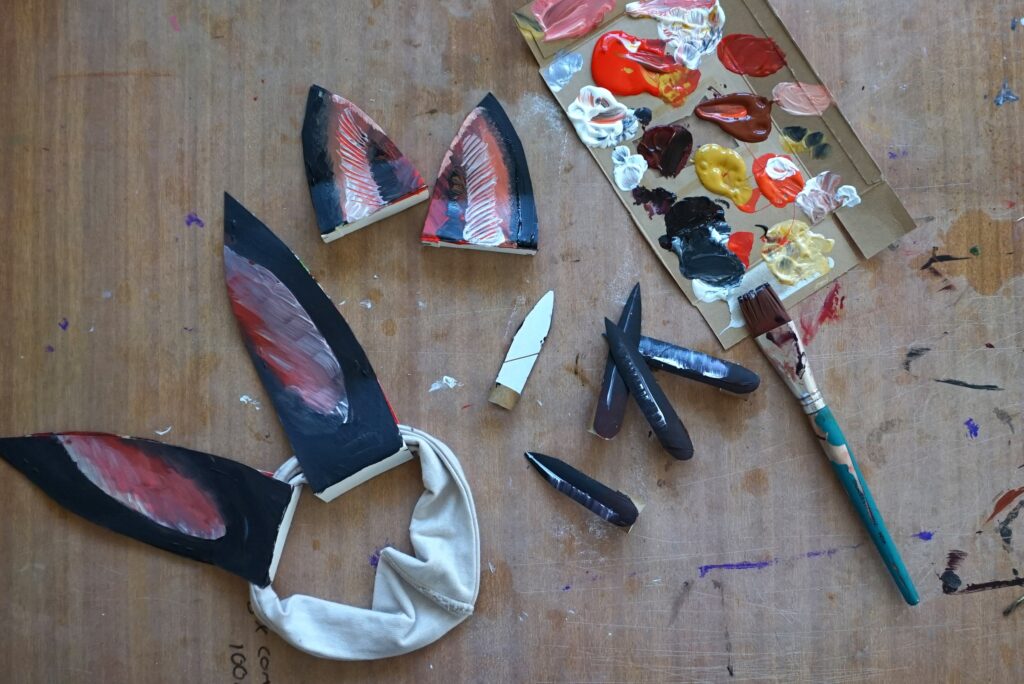
Now get creative with paints, and remember hairy texture for your ears!
All you need now is some cool facepaint and a cloak – and you are Halloween ready!
Watch this space for the next blog post – more creative costume making ideas coming your way!
Tracy x