
Dads Rock!
Father’s Day is on its way!!!!!
Let’s celebrate our awesome cool dads and granddads with this fun simple project that can be created using some upcycled bits and bobs that I am sure you will have hiding in and around your house somewhere!!
In this budget-friendly picture frame design we will transform a piece of cardboard box, some bits of collage, plastic pieces, game pieces, Lego, any cool things that reflect the personality of your dad, into a creative ‘frame’ full of love!
Personalise your design however you wish!

Suitable for kids from 4 yrs and up – a great project for little kids to practice their cutting and gluing skills and improve fine-motor skills.
A wonderful way to explore and learn about colour, pattern and shape with your mini-maker.
Lets get creative and make an awesome artwork for that someone special.
You will need…..
Step 1 – create your frame base from the cardboard – cut it to the desired size. Glue in the centre your A5 coloured card to create a clear border.


Step 2 – Think about which shapes you are going to glue around your frame. Have fun arranging and getting right before doing any gluing. Once you have a rough idea remove off the frame. Have a few smaller shapes and some cut up playing cards ready for filling in some of the smaller gaps.
Step 3 – fill your frame with a generous squirt of PVA glue all around
Step 4 – get busy gluing all of your shapes into position. Fill in all of the remaining gaps with some smaller pieces/ cut up shapes. We want it to look nice and full (and fun).
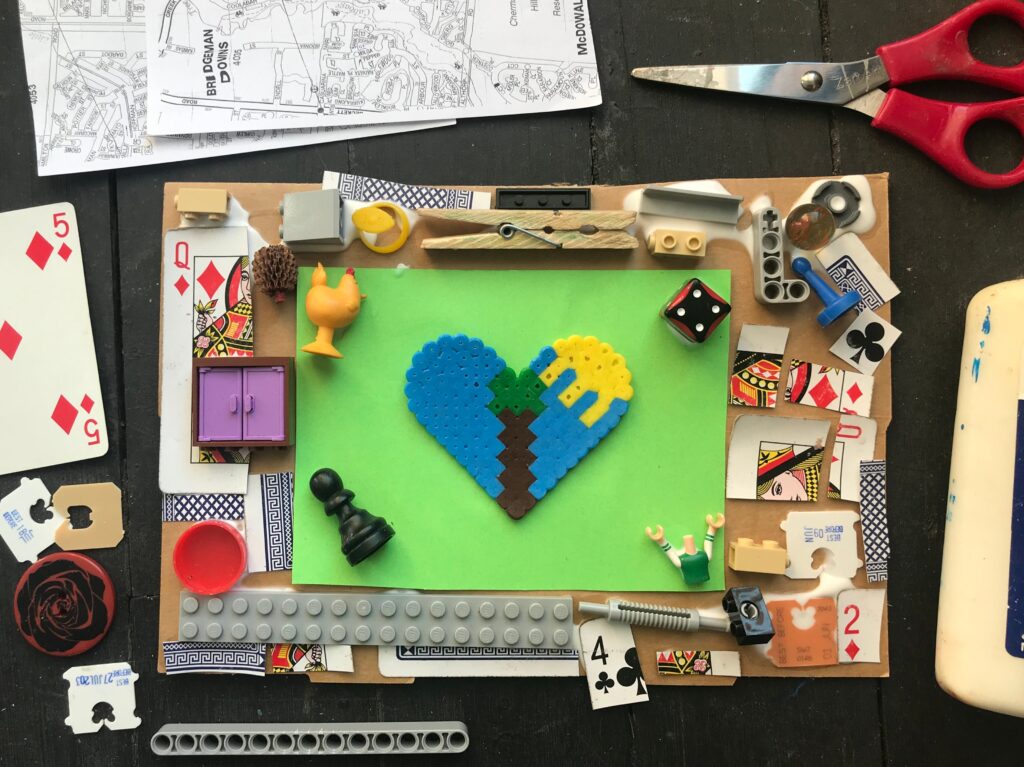
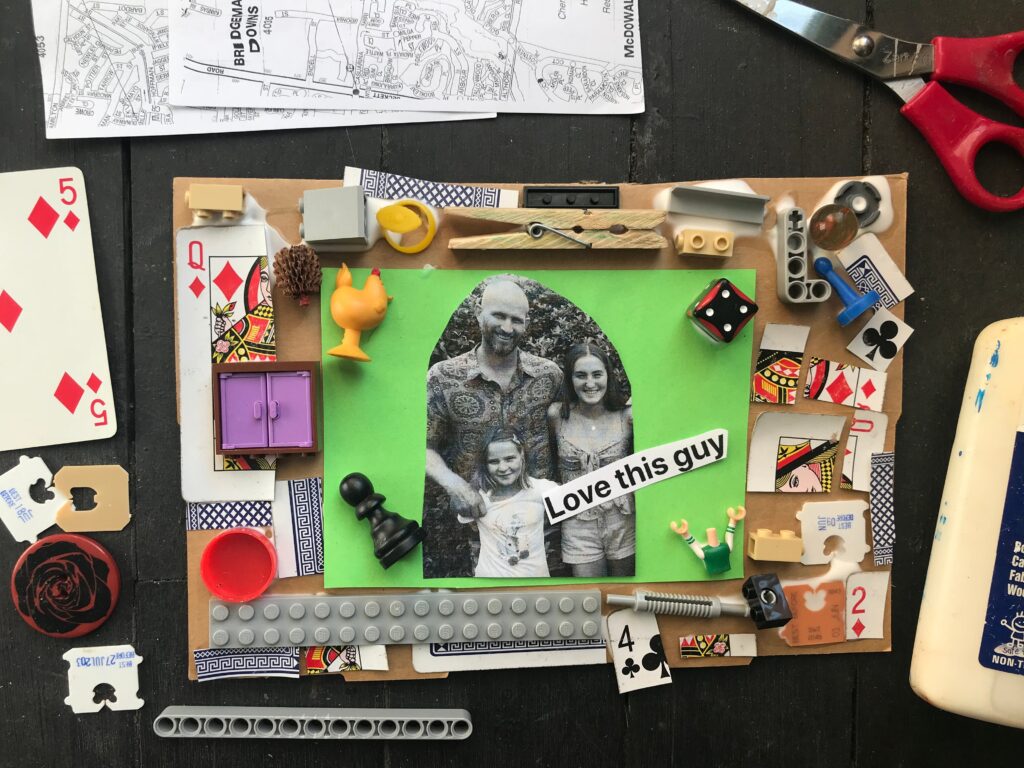
Step 5 – think about what image/s you are going to glue in the middle. This could be of you, or your dad, or you with your dad. If you aren’t keen on a photo, perhaps cut out a nice big love heart.
Step 6 – allow to dry – keeping it flat. You may need to just keep pressing some of the shapes down as the PVA starts to set. The glue will also turn clear as it dries.
Step 7 – once dry you can attach string on the back with some tape so your frame can hang on the wall, or make a little stand from a thick strip of box card so Dad can stand up your awesome creative frame on his desk.
Step 10 – admire your beautiful frame – wrap it in some lovely paper tied with string and give it to your Dad this Father’s Day – made with love.

What do you think?? Would your kids enjoy creating these crafty creative frames??
Let us know your thoughts. And here’s to a fab Fathers Day 2020.
Tracy x