
Gumnut Collage
I love sculpting with paper and card, it involves some savvy problem solving skills, but I think kids aged 10 are up for the challenge. This week the kids can make some super cute gumnut paper sculptures. This activity is a fun way to start a discussion about native plants and flowers, maybe try and find some gumnuts or blossoms outside before starting the activity?
You will need some assorted warm coloured paper and tissue paper, some brown card (not box card), some green card for leaves, a background card to glue it all onto, scissor and gluestick.
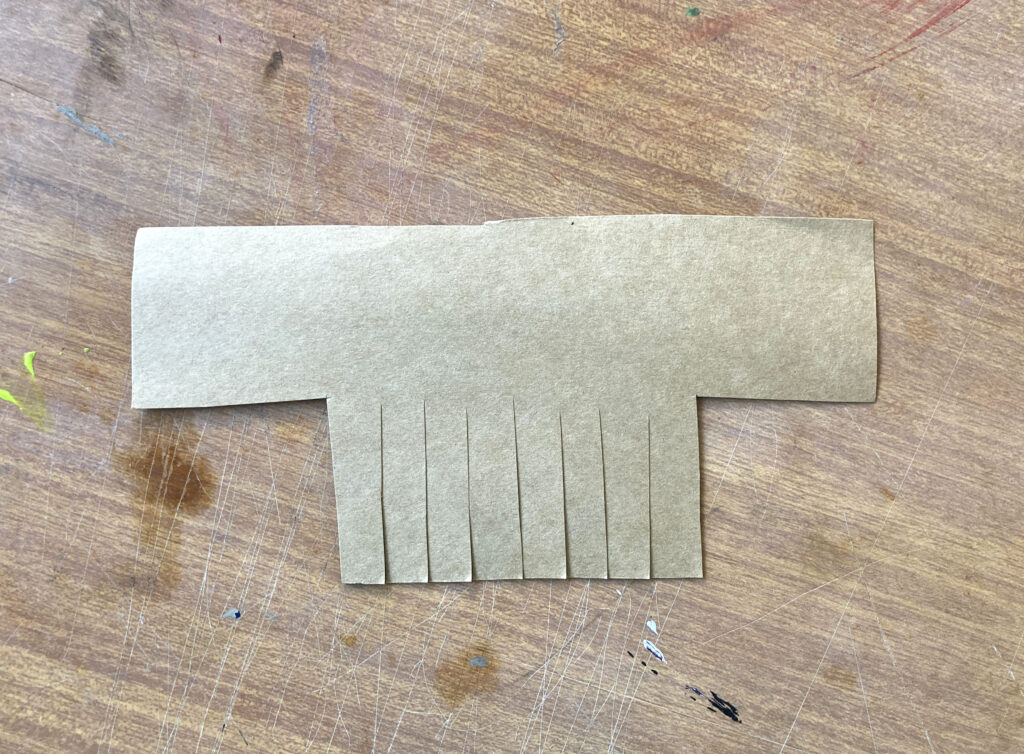
Start by creating the shapes below on your brown card. It might be best if you are doing this with a class to make some templates, but if you can also just walk the kids through it step by step. Start with a rectangle, and cut out those square bottom corners, then create a chunky fringe on the bottom tab.


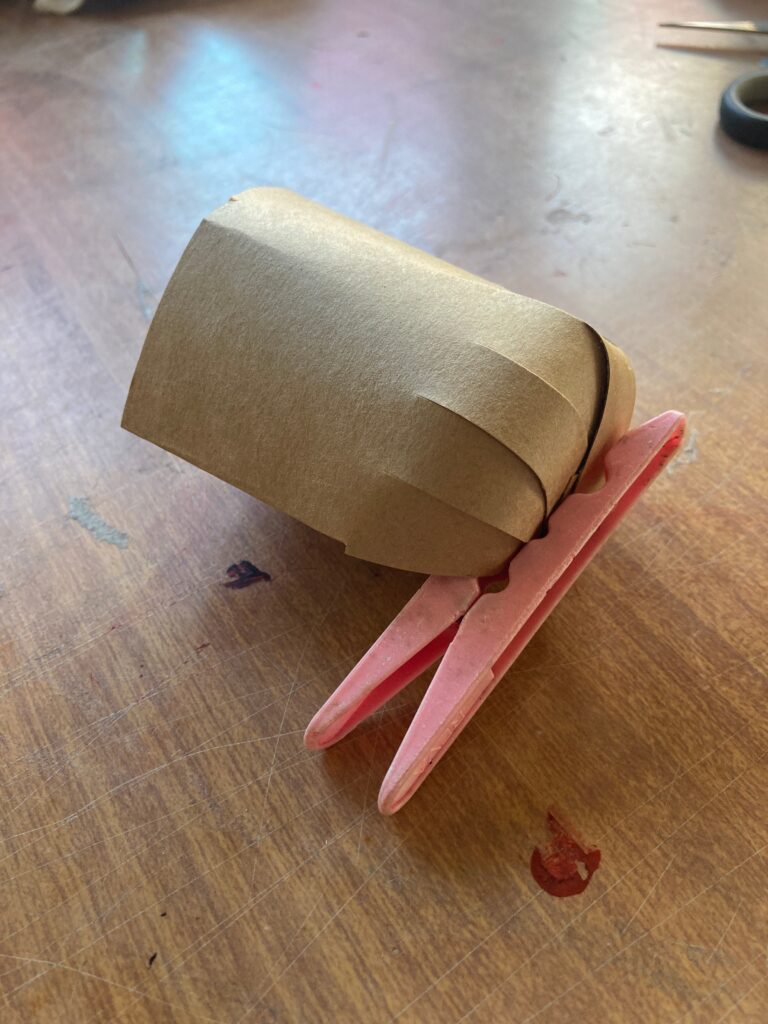
Fold the side flaps inwards, and then glue them together so you have a 3D arc, this step will be easy for the kids.
This next one can be a bit tricky, younger kids may need a set of helping hands. Glue generously on both sides of the fringes with a gluestick, then fold them in to create a half dome, allowing the pieces to stick to one another…either pinch in place for one minute or get a peg to clamp it in place.
Make at least two or three!
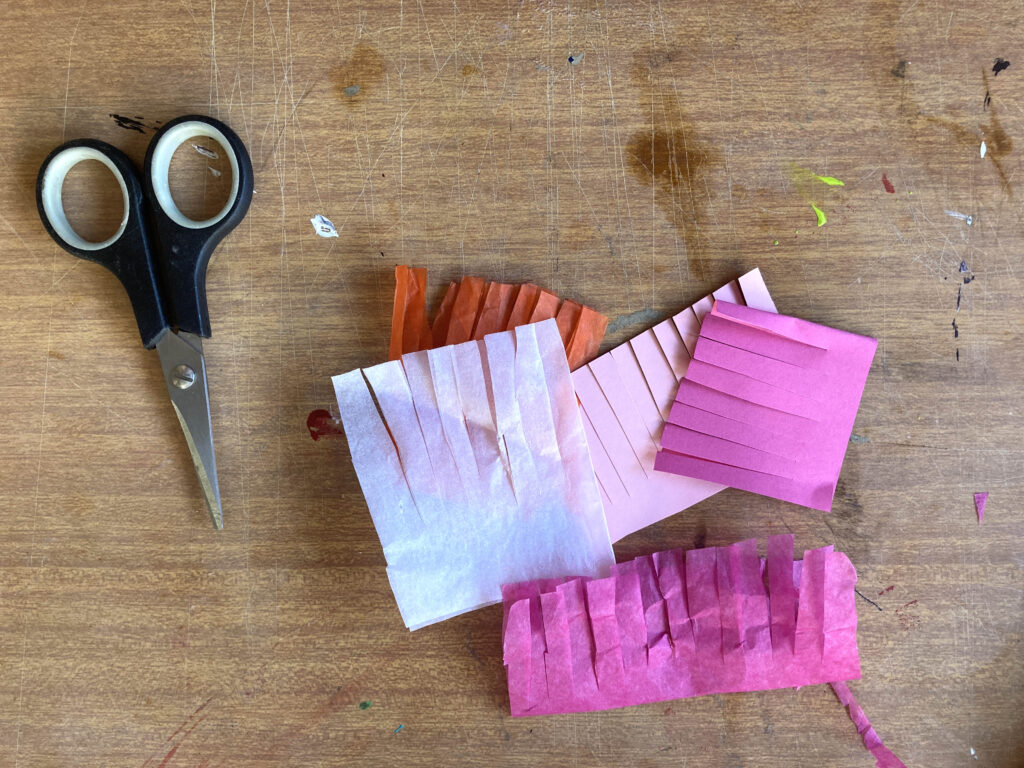

While you are waiting for those to dry, cut some pink, yellow, white or orange fringing, these will be the blossoms, so make them as chunky or wispy as you like. Once the gumnut is dry, add glue onto the base of the fringing, and stick them inside the nut. Their little hands are good for this.
These can be arranged and the flat side glued down to your larger backing card.

Finally make some leaves. Cut some long, elegant gum leaves from your green card. Slice from one leaf point to the centre of the leaf. This will allow you to glue and overlap the leaf sides to create a curved 3D leaf. These can be glued down to the backing card again.
Maybe cut some thin strips from your scraps to make branches also. I like the look of it being upside down, like real gumnuts.

I really love this idea – might be a nice one for MOTHERS DAY which is coming up soon.
We have a few other Mothers Day projects up our sleeve too – have a look at these ones….
Love you Mum! – cool upcycled badges
Triple Mothers Day crafty ideas – 3 x fun wallhanging projects
Flowers for Mum – fun upcycling project
Do you have any go-to Mothers Day projects?? Let us know – and share with us! We would love to see your ideas.
Happy crafting!
Tracy x