
Scraped seas
Sometimes to get students to relax and lose themselves in the making we need to take away the tools that they are familiar with. Pens and brushes are intimidating and often frustrate students who want to create what they see in their heads.
Let’s focus instead on texture and movement in this seascape activity.
I easily discovered a range of plastic scrapers in my recycling bin. I selected a medication packet, a plastic strawberry carton, and a textured vegetable tray. I cut each of these into small manageable scrapers, their size can be changed later if need be, but try cut the edges as straight as possible.
The base card is ideally A3 to have plenty of space to play, and card is preferable to paper so it doesn’t tear. The background can be any colour really, though I tried with white and blue
You might use blue/black/white/green acrylic paint, and try mixing some cool toned colours of your own too.
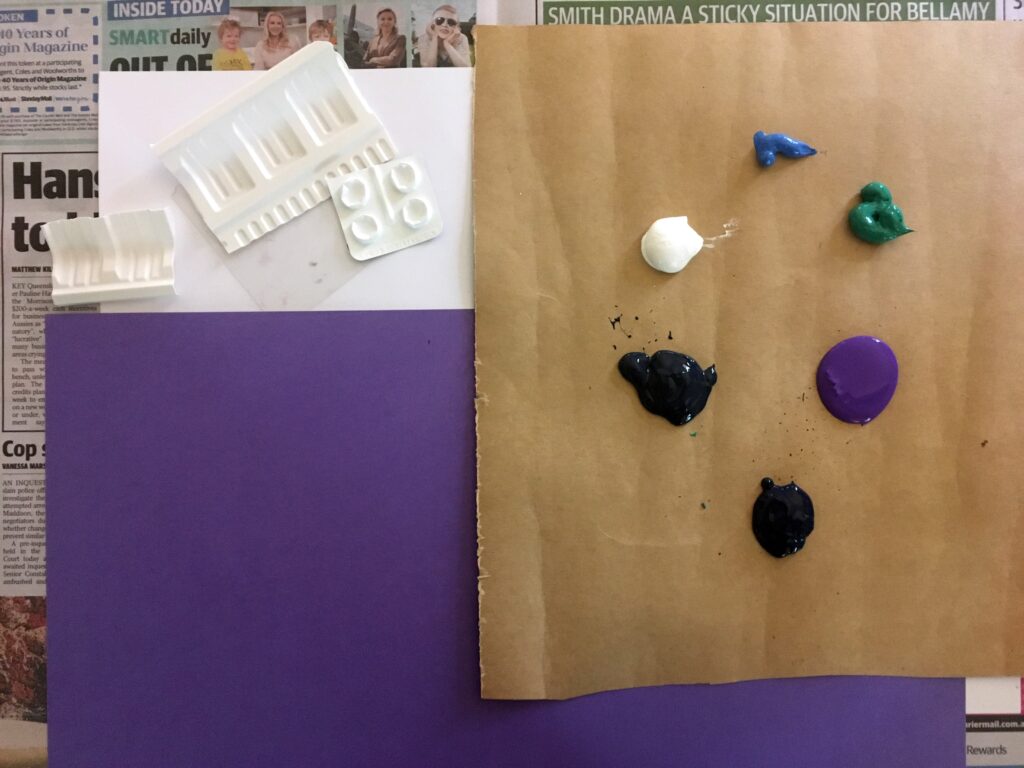
Dip the scrapers directly in the blobs of paint and start scraping! Try to think about the way that water gets choppy on a windy day, or go one step further, play the sounds of the ocean or a storm in the classroom to get everyone in the rhythm.
The last colour to add is some white details, these will look like foam. Remember, don’t use the scraper like a brush to ‘draw’ – keep an eye out for kids using the corners! We are going for the feel of the ocean, not an exact replica.
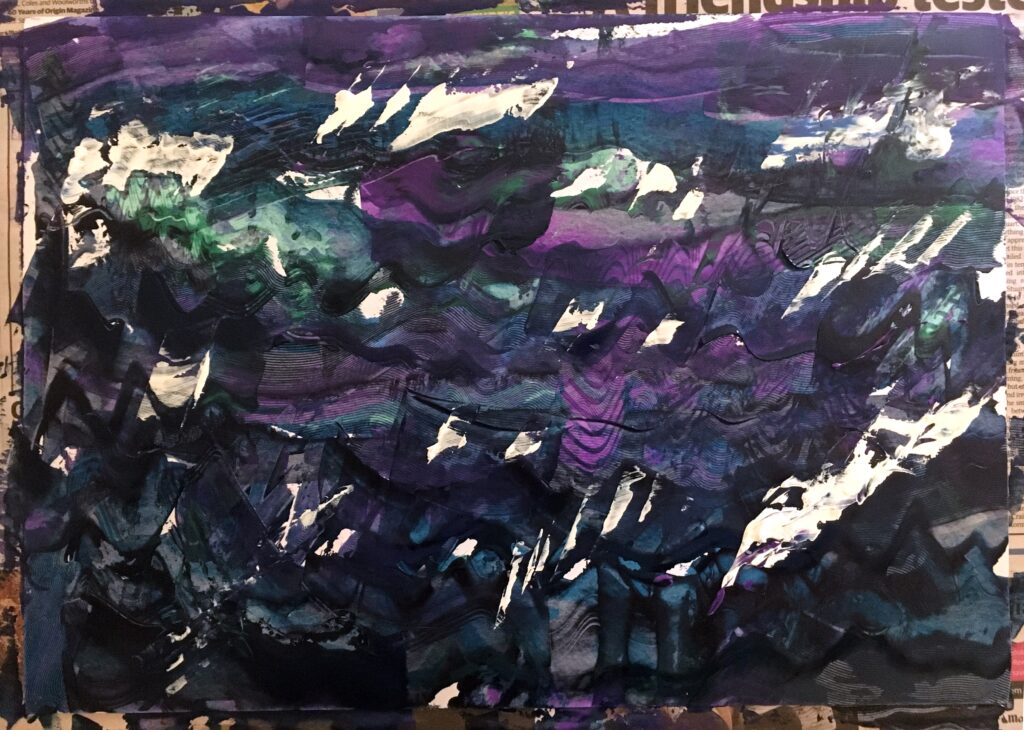
Once you have made your textured sea-scraped painting and it has dried (which might take a few hours depending on the paint build-up) you might like to try one of these three activities?
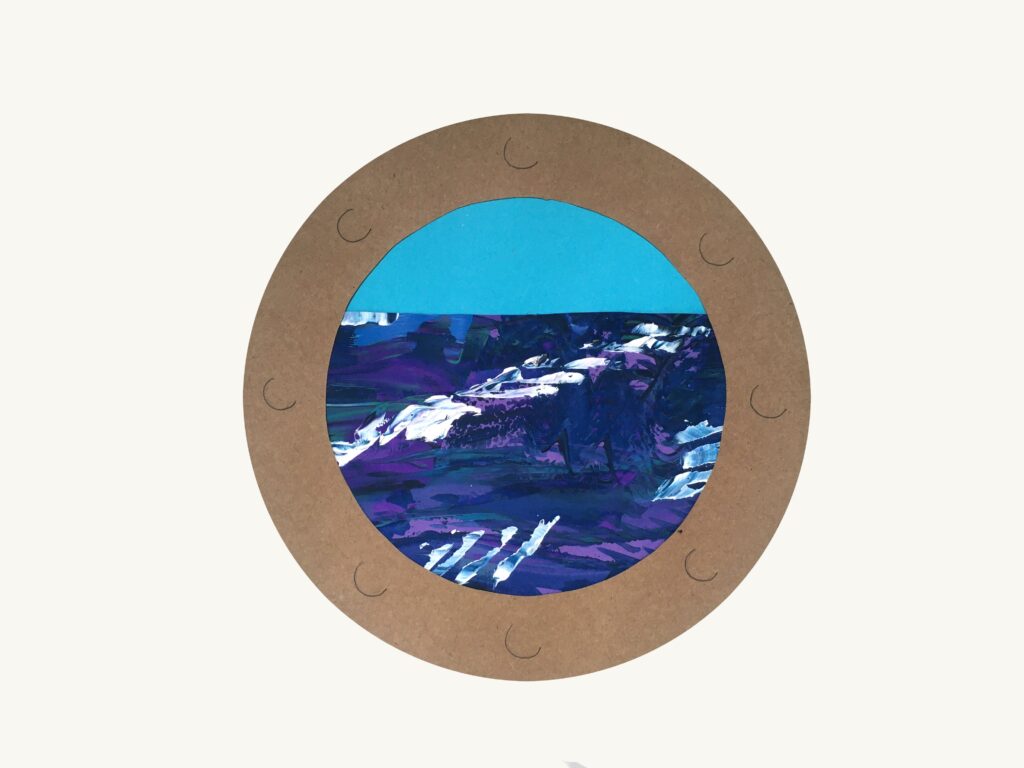
Porthole – Cut a large circle out of the sea, the top third can be covered with a light blue or white paper to make the sky. Make a thick brown/silver/gold circular boarder which will become the porthole. Add porthole details with pencil or pen of you like.
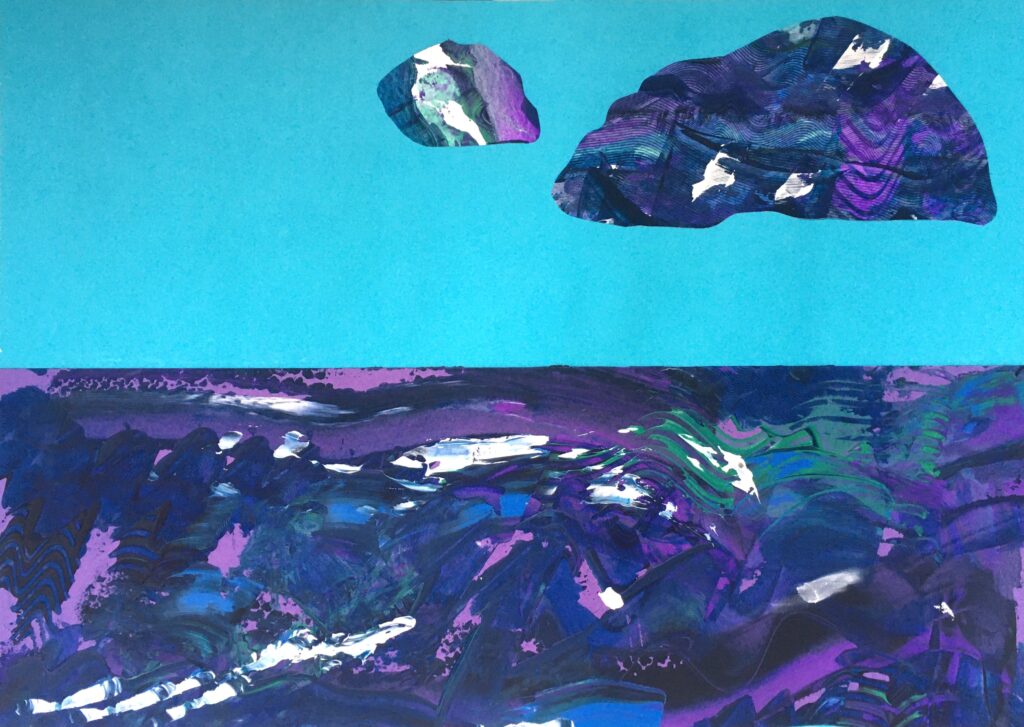
Seascape – Cut the image in half to create a horizon line for a new picture. Glue to the bottom of a fresh piece of A3 card white/blue/black card. The remaining sea can be used as collage to create stormy clouds.
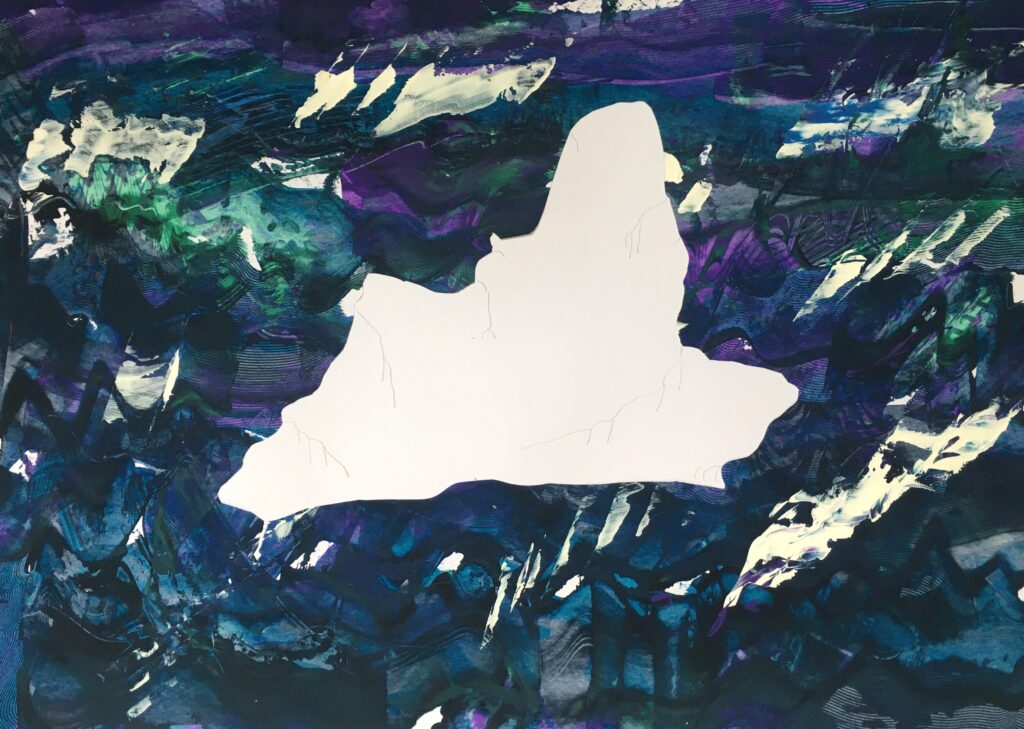
Antarctic – You could just cut out an iceberg using white card, and then glue it onto your scraped sea background – or flip your scraped sea over and draw an iceberg shape on the back, make itBIG. Cut the iceberg out of the middle and paste it onto some fresh white paper or card. Add simple iceberg details/shadows using a lead or light blue pencil.
Check out these Artists: William Turner. Roni Horn, Still Water series