
Are you looking for a cheap and creative project that you can do with your kids? This idea is definitely low budget – if you have an old toilet roll, scissors and glue – then we can get crafting!
We will transform a toilet roll into a super cute unicorn. Sounds like magic doesn’t it??
Suitable for kids from 5 yrs and up – a great project for little kids to practice their cutting skills, and improve fine-motor skills.
A wonderful way to explore and learn about shape and construction with your mini-maker. Lets get creative and make an awesome artwork that can be used for display or imaginative play!
You will need…..
Scissors
Glue – PVA glue is best
A toilet roll / or a paper towel roll cut in half
A couple of pens
Some paints – acrylic or watercolours – preferably white
A paintbrush

Step 1. – draw marks on your toilet roll for cutting out – you will need to remove a rectangle from the sides in the top third of the toilet roll (leaving a NECK and a TAIL) and the same at the bottom third also for legs. Cut a skinny strip from the centre of the front legs and at the back legs also. Leave the centre middle section of the toilet roll remaining for the body. If you draw in the lines, your mini-maker can carefully cut!
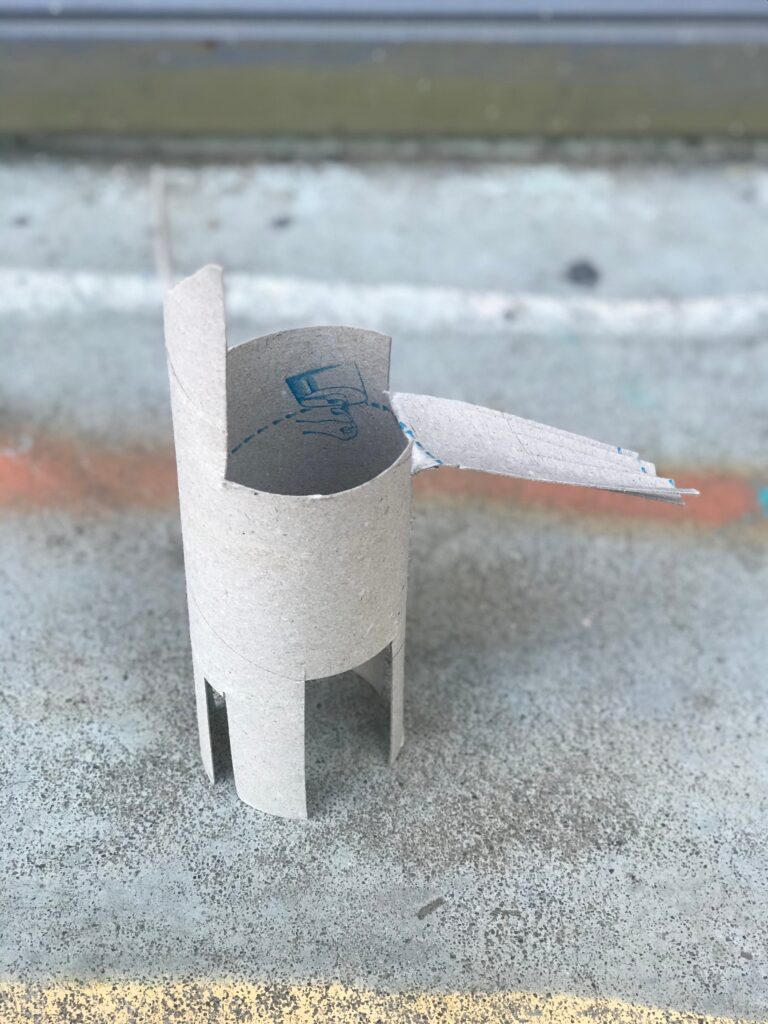
Step 2 – fold the tail downwards and cut some fringing into the tail for hair , and leave the neck pointing upwards. Cut a couple of pointy ears from the top of the neck.
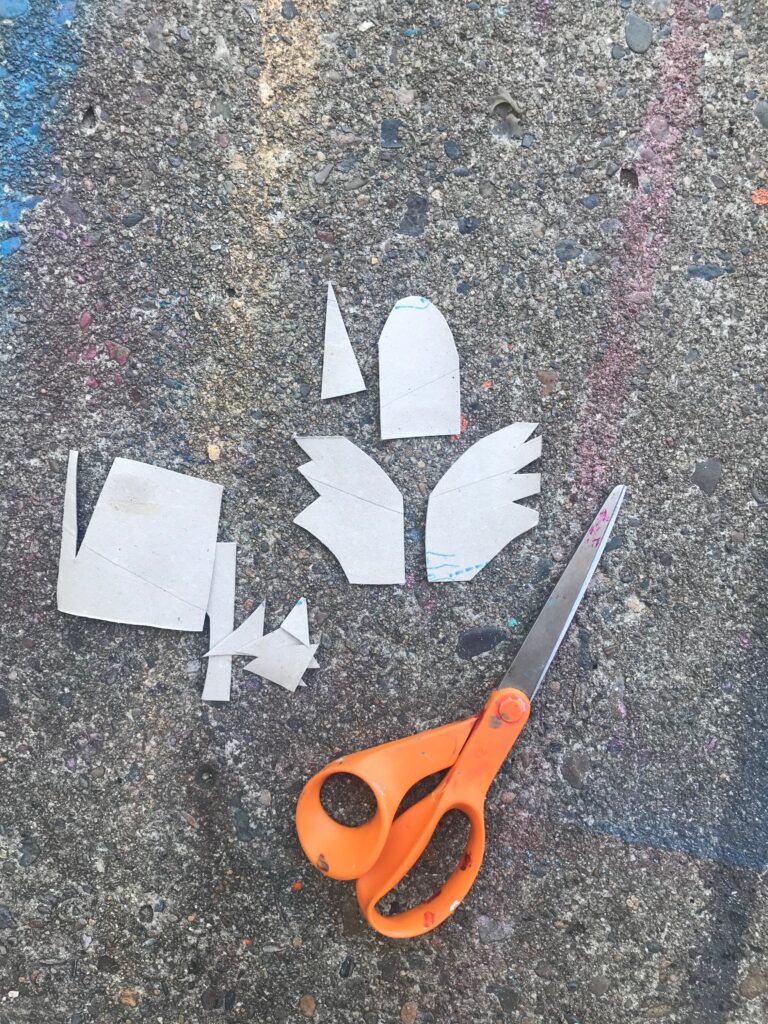
Step 3 – with your scrap pieces cut out a small arched shape for the head, a small triangle for the horn, and a couple of wing shapes.
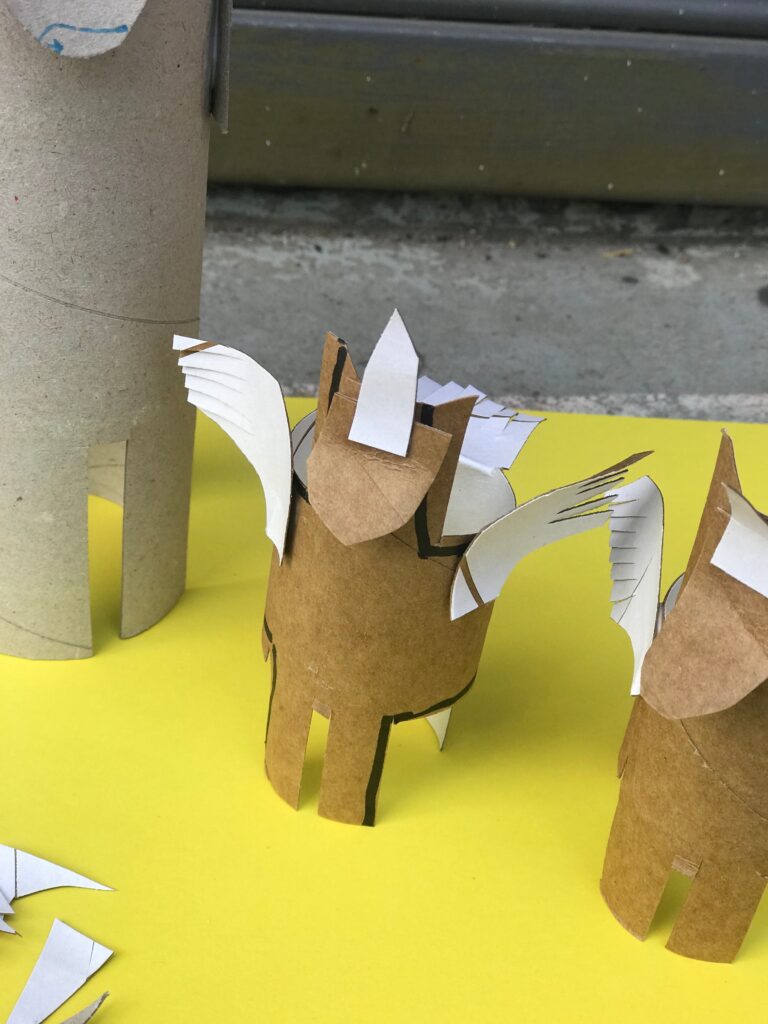
Step 4 – use your glue stick or PVA glue to attach your head on (only glue the top back of the head onto the neck, so that the head can bend out from the neck slightly) Glue on the horn, and the wings too.
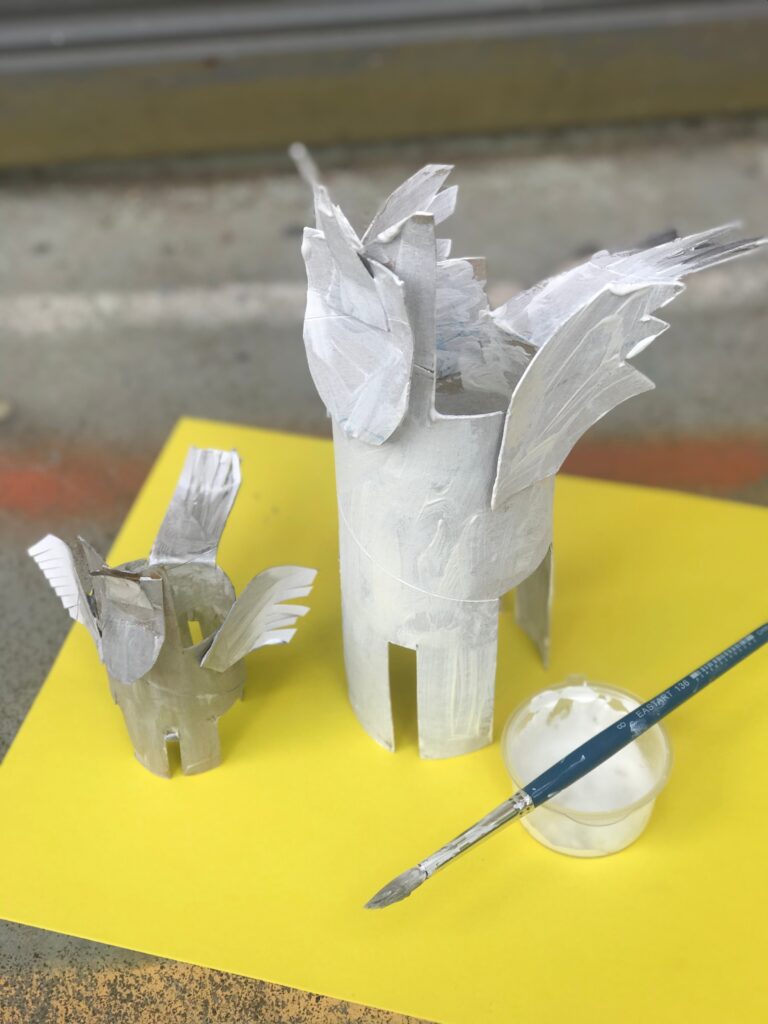
Step 5 – once glue is dry paint!! Whatever colour you want – white is a classic unicorn colour.
Step 6 – once paint is dry decorate and detail with markers and pens – add in features – a face, hoofs, wings, stripes on the horn. Add in rainbows and stars to make it look mystical.
You can add little sparkly extras too – like sequins, and maybe use wool to create a decorative mane down the back of its neck.
Step 7 – admire your little sculptures! Well done team!
