Boy do we love printmaking here at the RAW Art studio.
And – kids LOVE printing too! The joy of pressing one painted shape onto a piece of paper and then seeing what print effect it makes, is pretty big! Simple pleasures. Kids have been creating prints starting way back in their kindy days – painting their fingers, hands, feet to make colourful prints. Stamping with cut up pieces of potato and apples, and leaves. Classic kindy art fun!!
Time to raise the bar, and elevate our kids stamping and printing experiences.
I have a few simple ideas, that don’t require too much equipment, and are super budget friendly, but will definitely have the wow factor.
Round things – use the ends of lids (of all sizes), toilet rolls, corks – anything round. Using only round shapes, and a limited palette of colours, print in layers – start with one layer of prints, allow to dry, then print over top with a second colour, and a different size shape, and then repeat again with a third colour and shape. This is fantastic way to explore pattern, repetition, colour, shape. This is also a fun way to explore Op Art (check out Bridget Riley’s work here).
** a little tip – keep hold of all of those glue stick lids that make their way into your bin throughout the year – these are perfect little stampers.
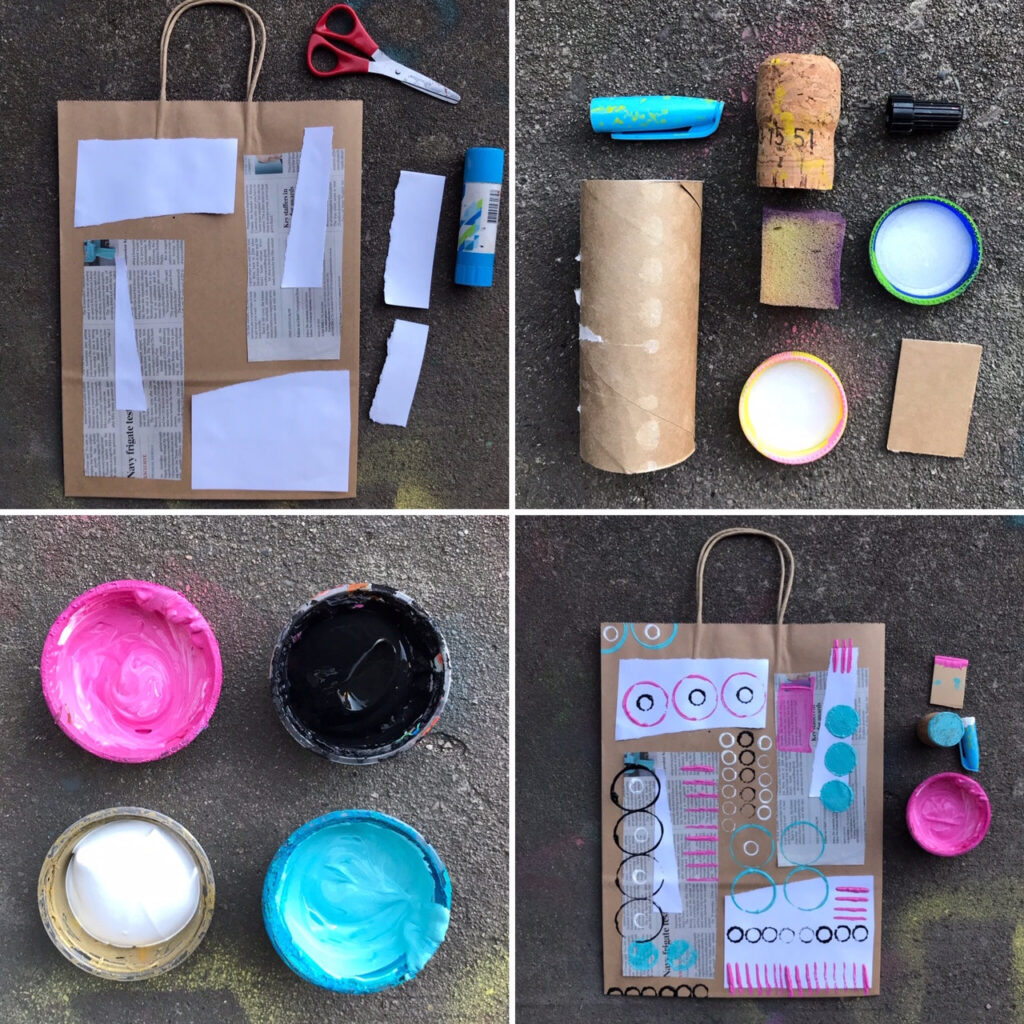
Cardboard – we love using little cut up bits of cardboard as stampers – old boxes cut up into small rectangles (perfect size for little fingers to pinch hold and print with) – to create pattern or texture within an artwork. It’s a fantastic way to finish off a project – with some stamping accents. Especially great with just black and white paint. What is also great is that there is limited clean up – just throw those stampers in the bin when you are finished. Sweet!
** a little tip – try and use firmer cardboard – if it is a bit too soft, it will get soggy real fast and you won’t be able to stamp for long at all.
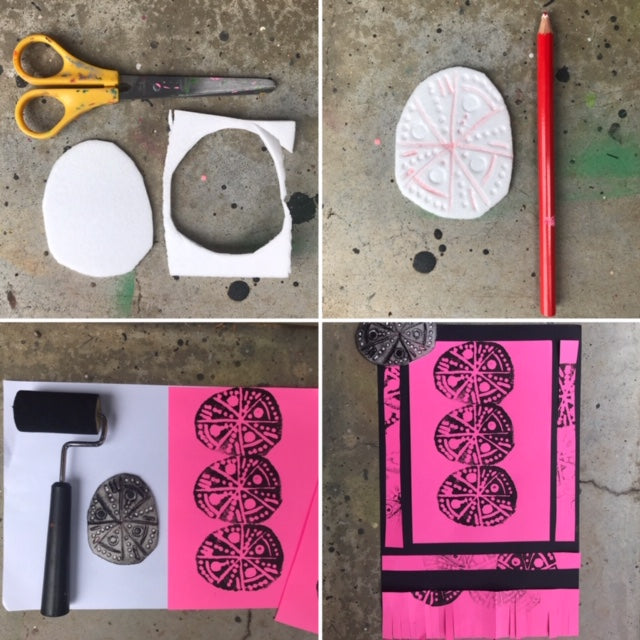
Print foam – a little bit more expensive than the found objects – but a perfect resource for printing activities – just cut the foam to whatever size ofr shape you need – and you can etch into the printfoam with a pencil – any shapes/ pictures/ patterns you like, and roll paint on with a roller, or simply use a sponge and just sponge on a bit of paint. Then print onto paper, card or fabric. What is great about Printfoam, is that you can wash it, then re-use over and over. Perhaps pull the stampers out each year for some Easter/ Halloween/ Chrissie craft.
You can purchase Print foam through a supplier such as Oxlades – check out this link.
** a little tip – blunt pencils work best for etching.
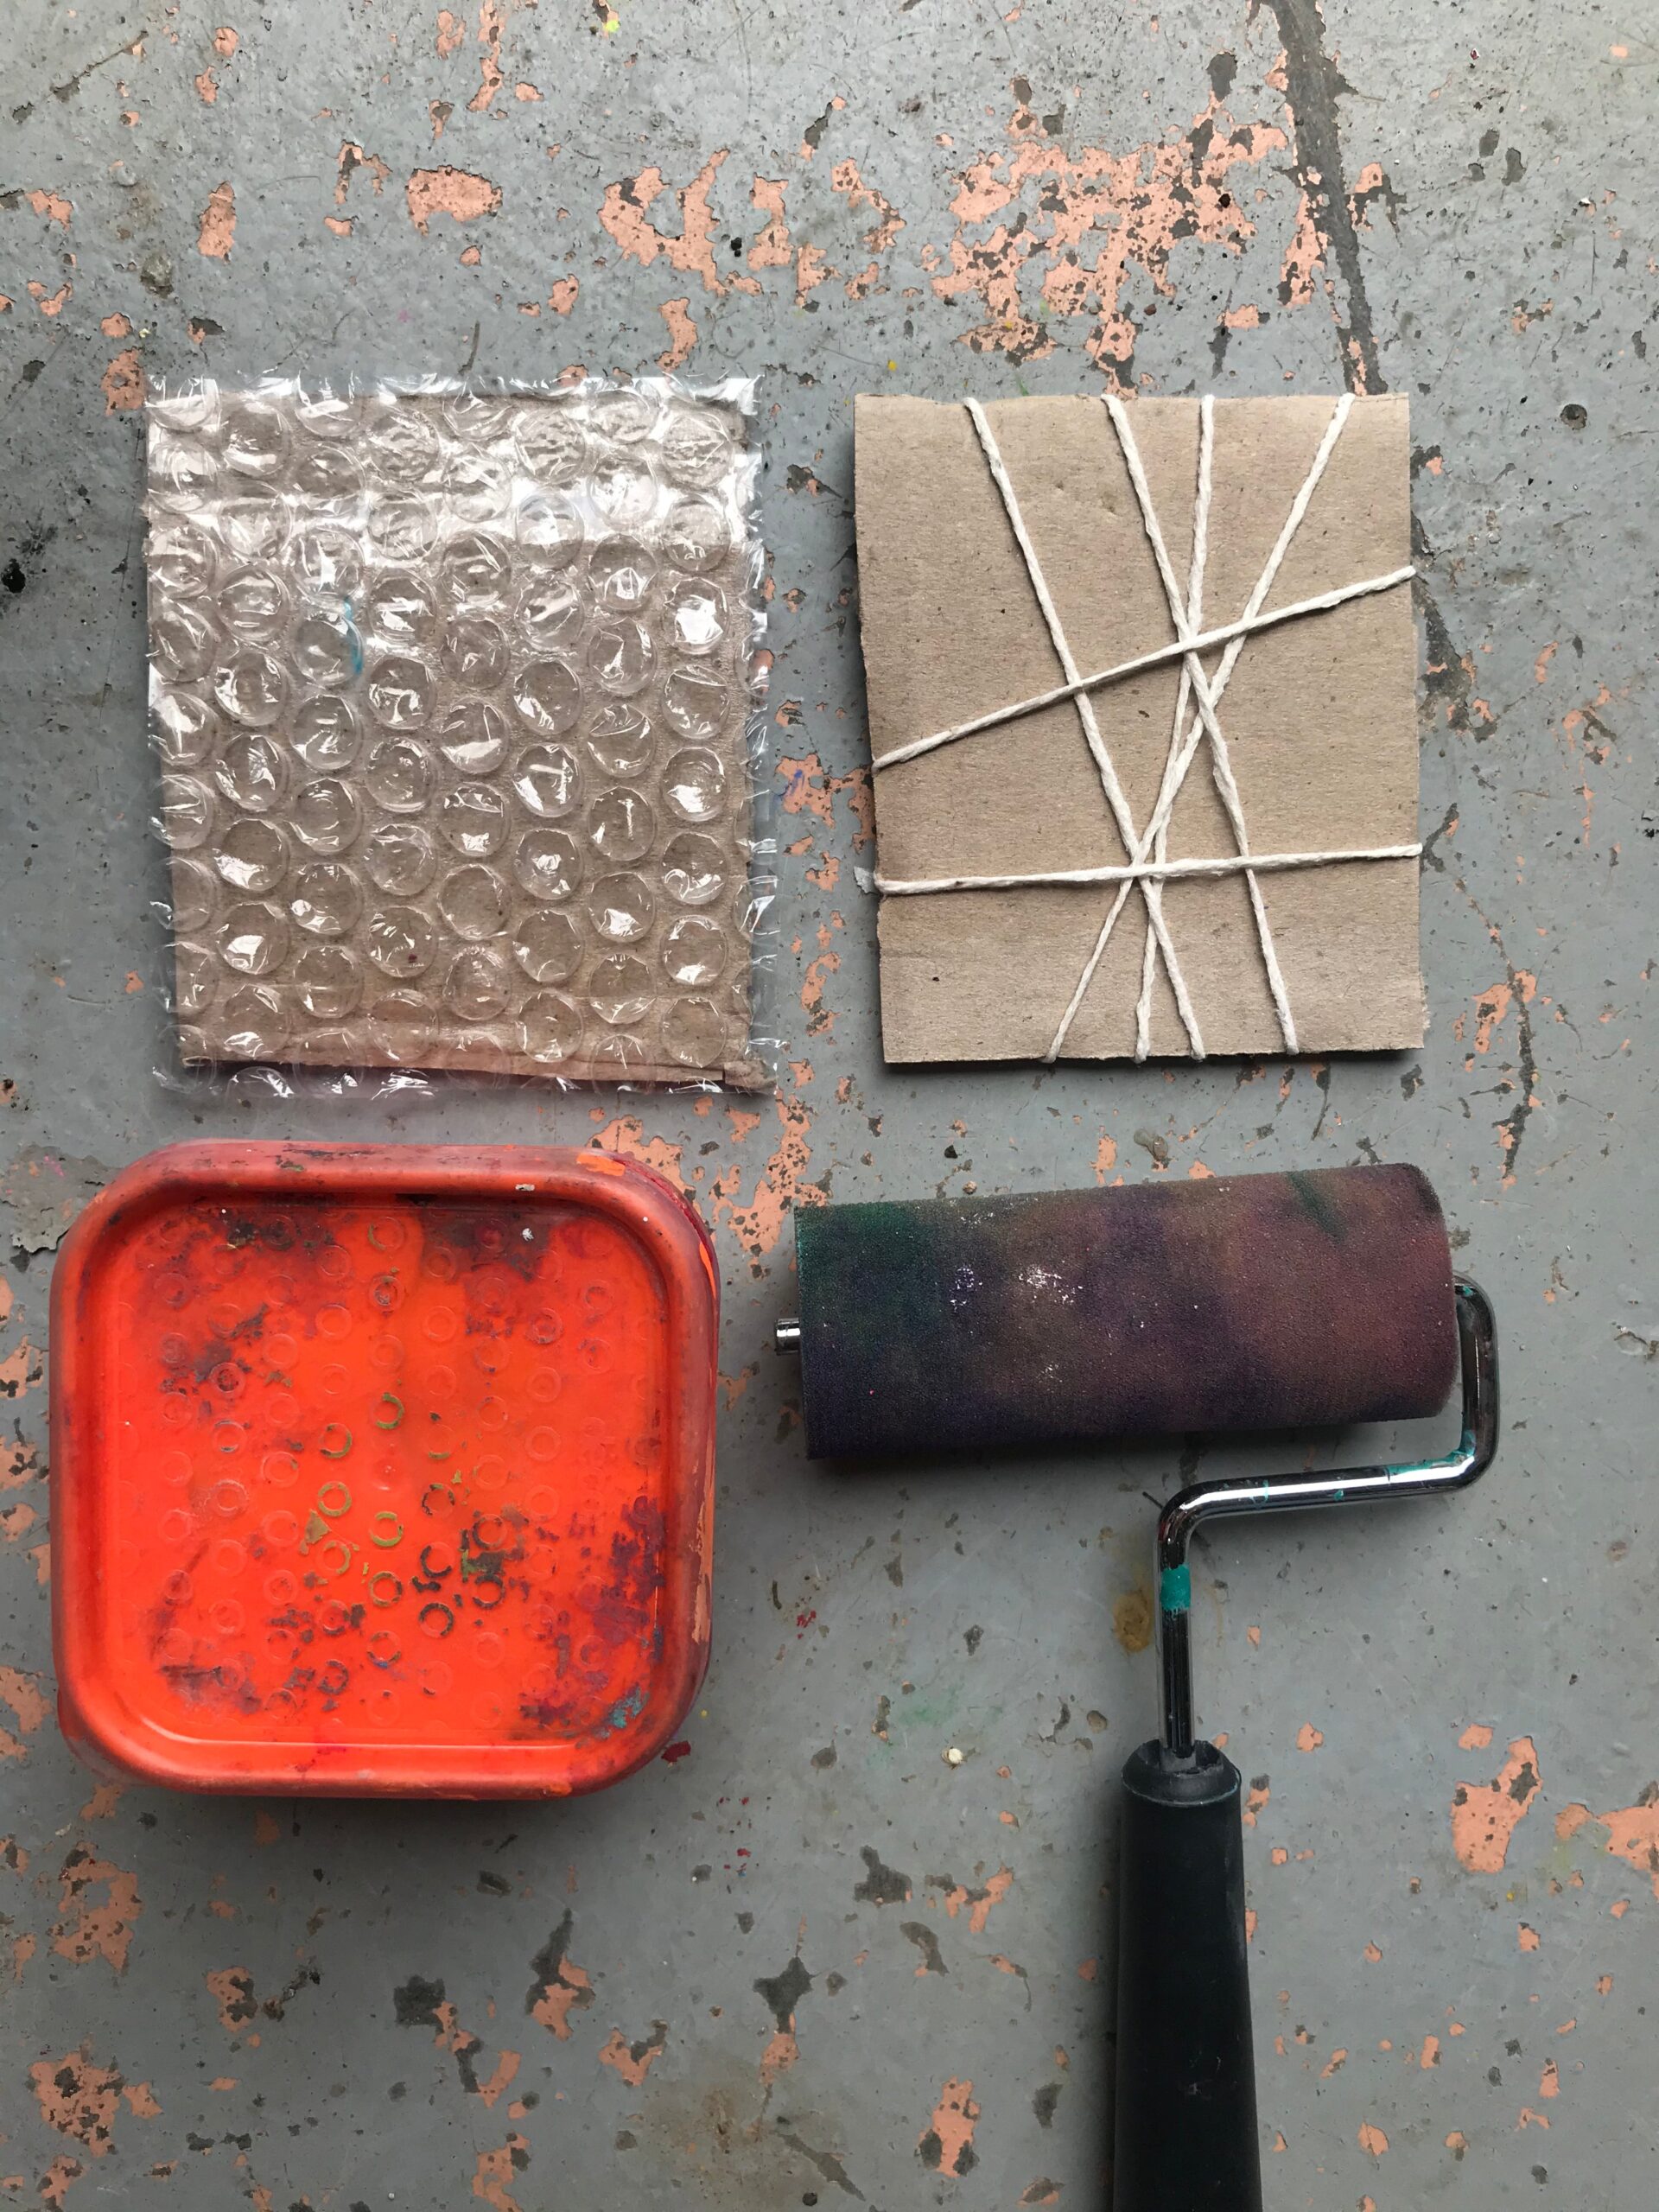
Bubble wrap – cut up a square piece of bubble wrap and PVA glue it onto a square piece of thick cardboard. Once it is dry, get busy stamping and printing. The effect of printing with bubble wrap is always a winner with kids – perfect for creating backgrounds to projects, or for cutting up and collaging into an artwork. Older kids can create their own stamper – and I recommend that you pre-make the stampers for the younger kids. These will also keep for future projects – you don’t even need to worry about cleaning or washing them – they will keep on printing for a few sessions.
String – wrap a piece of string around a sturdy piece of cardboard quite a few times, and sticky tape the string down on the back with some masking tape. Apply paint with a roller, and stamp onto paper or card – super cool effects, costs next to nothing, and your kids are learning all about the principles of printmaking.
