Upcycled creative art project!

Give the gift of handmade (and recycled) love this Mothers Day!
These cute floral wreaths only require a few bits and pieces from the recycle bin and
are easy to make. Retrieve an old cereal box or the like, a toilet roll, ribbon or string (
I always save the ribbon from gift packaging).
In addition, you will need some coloured card, markers, scissors, hole punch and
PVA glue. If coloured card isn’t on hand, use some of the cereal box card and colour
it with your markers, paint, or anything you have to add colour!
Begin by making the wreath base. Trace around a circular object of the desired size
and cut it out. Trace a smaller circle in the middle and cut this out. Hole punch the
top and bottom of the base. Write a special message for your mum on the back of
your wreath base.
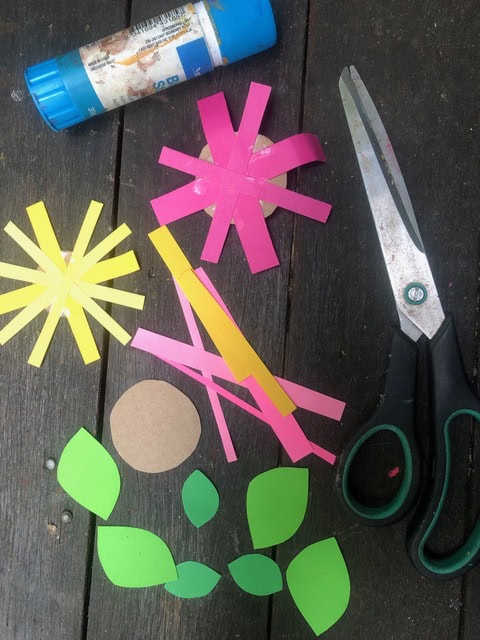
Next, the flowers! Using the coloured card, cut out a few circles for the centre of the
flowers. Now cut some long strips for the petals. Squirt some glue on the back of
each circle and arrange the petals, pressing them in place. Play around with layering
petals of different colours, widths and lengths to create fuller flowers.
While your flowers are drying, make some cardboard leaves. The easiest way to
make a leaf is by starting with a rectangle shape and trimming all four corners off.
Vary the size and shape of your leaves to create a more interesting composition in
your wreath.
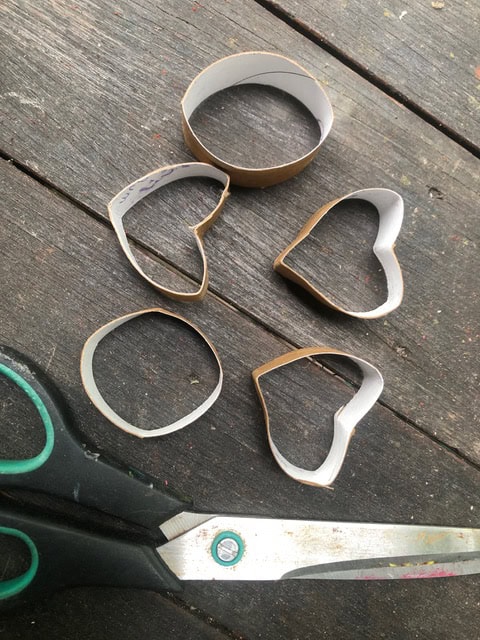
Now for the hearts! Slightly flatten your toilet roll and cut it into about five or six rings-
depending on how wide you want your hearts to be. Shape the hearts by pinching
one side of the ring for the bottom of the heart, then pinching inwards on the
opposite side to create the top of the heart.
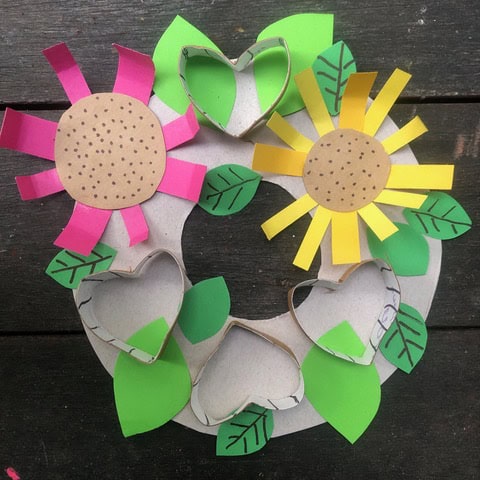
Your flowers should now be dry enough to work on patterning the centre of the
flowers. Will they have all the details of a real flower, or will they be uniquely yours?
What about your leaves and hearts? What type of patterns will you draw on these?
Grab your markers and have some fun!
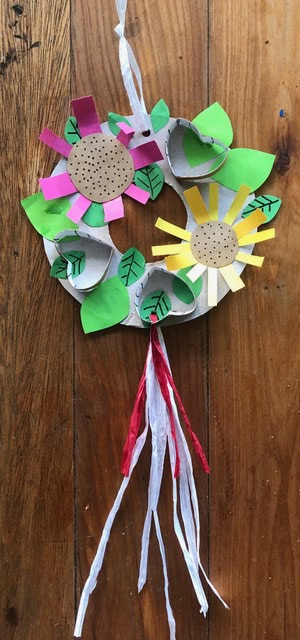
With all your components complete, it’s now time to assemble your wreath. Grab
your ribbon or string and attach a piece through the top of the wreath for it to hang
from. Now attach some longer pieces through the hole at the bottom of the wreath to
create a tail. It looks nice if you have a few different colours to layer here.
Spend some time playing around with where you are going to place your flowers,
leaves and hearts. Once you’re happy with your placement, glue everything in place.
Allow your wreath to dry on a flat surface, then find a secret spot to store your wreath
until Mothers Day!
Looking for some other great Mothers Day ideas? Check out these ideas……time to get your craft on.
Mothers Day Badges – create a very fun and funky brooch for mum.
Love Hearts 3 x ways – a few simple Mix Media projects – celebrating LOVE!
Mothers Day Craft x 3 ways – 3 cute ideas Mum will love.
Trash into treasures – Mothers day flowers